Friday, April 22, 2016

Growing a Vegetable Garden

 This time of year, everyone begins to think of planting. Whether it be flowers, vegetables, or both, we all long for something pretty to look at after the long, cold, grey winter.
I decided this year that I wanted another try at vegetable gardening. I am really good about starting a garden. I get excited about all of the vegetables that will be sitting on my table during the summer, and how proud I will be to serve my family foods that I have raised myself.
Then reality sets in.  
I forget about my garden. 
I forget that the plants get thirsty. I forget that the weeds need to be pulled. I forget that the ground needs fertilizer and that the plants need help keeping the bugs away. 
Another excuse I always use is it just gets plain hot here in Alabama. Nasty, humid hot, where you can almost cut the air with a knife.
I mean, who wants to go outside and sweat to death for a little ole tomato?
 Obviously not me.
 However, I am trying to turn over a new leaf. 
Plus, hubby said I wouldn't be able to keep it alive, so now it's personal. I refuse to be defeated.
This garden will survive and I will be eating vegetables from it in about 90 days, give or take.

 Hubby built these raised beds for me a few years ago. Every year I have the best intentions of growing food...but it hasn't really happened yet. I know for a fact that I can successfully grow weeds in it, though.
 It took me two hours of digging to clear out all of the weeds. I was so exhausted after that. I am so thankful for grocery stores!!

So what am I growing(besides weeds)?

-pickling cucumbers
-tomatoes
-squash
-zucchini
-cabbage
-lettuce
-carrots
-basil
-rosemary
-thyme
-jalapenos
-habeneros

There is no rhyme or reason to my selection. I ran to Lowes one day and that was what caught my eye. I normally buy all of my vegetables for canning from the Mennonites in Kentucky. So, these veggies are just to get a feel for gardening. That way, when the apocalypse hits, I will know how to keep us alive a little longer!!

I will post progress pictures as the garden gets bigger. Help me stay accountable, y'all! I can't let hubby be right on this one!!!


Wednesday, April 20, 2016

Laundry Room Renovation-Part 3

 I'm so glad you're back! 
In my last two posts, I shared with you our thought process in creating a more functional laundry area, and the beginning stages of building out the cabinetry.
Today, I am sharing the current progress of this space.
 The doors and hardware have been added to the enormous cabinets. (SOOOOOO much storage space!!!)
All of the cabinetry and trim have been painted and the counter top and bench have been stained.
And part of the crown molding has been added.
 Hubby installed a white subway tile back splash under the cabinets.  It's one of my favorite parts of the whole laundry room at this point. It offers absolutely no function other than being aesthetically pleasing, but sometimes that's ok, right?
You will have to forgive the over exposure of the back splash. The under cabinet lighting kind of washes it all out. 
Speaking of under cabinet lighting...we found an inexpensive light at Costco, and hubby installed it under the cabinets. I love how much it brightens up the room! It kind of makes folding laundry less depressing.


(click on the picture to find similar under cabinet lighting)

One of our concerns with the laundry room was I didn't have an area to stick ALL of the dirty laundry. This laundry tower solved those issues.
If you remember, I found my inspiration from this picture.
It is amazing to have so many baskets to sort all of my laundry in.
I really wanted to use wicker baskets, but it just wasn't in the budget, so we went with a Sterilite square laundry basket. Even though the wicker would have been much prettier, these baskets are clean and neat looking, and they definitely get the job done. They also fit the dimensions of our cubbies perfectly. 
Amazon had a great deal on the baskets, so we had them shipped in.

(click on the picture to get your own 6-pack of laundry baskets)

There are still soooo many things left to do in this room. Our list includes:

Adding wainscoting to match the Half Bath
Paint the walls a soft grey
Add crown molding and caulk
Add new light fixtures
Reconfigure the salon area
Add a little decor to finish it off

I'm sure that before it's over with, I will be adding to that list.
Everyone who has been in the laundry room lately has raved over it. Hubby and I are anxious for it to be complete. It seems like we have been working on it FOE-EV-UH!

I will keep you posted on any new updates we do to this room, so make sure to check back!


*This post contains affiliate links*

Monday, April 18, 2016

Laundry Room Renovation-Part 2


In my last post, I shared with you all the issues I had with the different layouts of our laundry room. In the course of 6 and a half years, our laundry room has gone through several different looks, but never meeting all of our needs.
After searching for inspiration for what seemed like weeks(which in all actuality was probably more like days...maybe even hours), I finally came up with a design plan. 
I felt like an HGTV designer with my own show. It was kind of cool.
My design addressed all of the issues we were having with the space. We have 9 foot ceilings, so by taking the cabinets all the way to the ceiling, it would create a ton of extra storage. Making the laundry tower for holding baskets would clear out the dirty laundry on the floor, with multiple slots for all of my sorting needs. We would also have a seating area where my clients would be able to sit, and the dogs' crate could be tucked away underneath. And, most importantly, it would be "purty."
 Problems solved.
I just needed someone to build it for me. Thankfully I have a handy dandy hubby.


We started out by completely deconstructing the laundry room...again.


Then hubby got to work making my dreams a reality. He began with the counter over the washer and dryer. He used oak plywood  for the counter top, and took it all the way to the back wall. It's massive and I love it, mu-wha-ha-ha! I wanted the counter to be stained, so that's why we went with a slightly more expensive plywood.
He tried to end all construction at this point, but obviously that was step 1 of 6,453.
Next, he made the tower. Now, wood only comes in 8 foot sheets at Lowes, and we have 9 foot ceilings, so he made the entire 8 foot tower, and later on added a box on top of the tower, so it would go all the way to the ceiling.
Now that the tower is beside the counter, there isn't any risk of laundry going MIA.


He then built the cabinets that go over the washer and dryer. This was something that truly tried his patience, and broke the tip of my finger, but they made it on the wall, so all is well.
The laundry room stayed in this state for a bit because we went on our amazing Disney vacation that I can't wait to tell you about!
 When we returned, hubby was back in the garage working his fingers to the bone to make Momma's dreams come true. 

Stayed tuned, and I will update you on the current progress. This room is still under construction, but it's starting to look beautiful!!

Friday, April 15, 2016

Laundry Room Renovation-Part 1 (again)

 Six and a half years ago when we moved into our house, this was what our laundry room looked like. Plain and boring.
I tried to add  a few touches in the corner to make it look a little nicer, but it was still fairly blah. Functional, but blah.
 Then I got the bug to decorate in the laundry room. I have people in there on a somewhat regular basis because I cut hair in the nook of my laundry room. I wanted the room to look a little nicer, so I had hubby build some amazing risers for the washer and dryer. 
I painted the walls, and it gave the room less of the cookie cutter look.
 I also added some seating for my clients, and that seemed to make things better.
  However, it didn't take very long before I was tired of that arrangement. It just wasn't working. We sold the risers and the bench, and we stacked the washer and dryer hoping to create more space in the area. We built a table to fold the laundry on, and I thought that was going to be it. 
There were still issues with the arrangement, though. The laundry was always on the floor, if I put clothes on the table to fold, things would inevitably fall behind the washer and dryer, the kids couldn't reach the dryer, and I really wanted to put the pups' crate in there as well, and there wasn't a place for it.
I sat in my stylist's chair one day and just stared at the laundry room. I kept trying to figure out what could be done to solve all of my issues. 
I hopped on Pinterest, and typed in Laundry Room, Laundry Room Storage, Laundry Room Design, anything that I could possibly think of for some inspiration.

After pinning for what seemed like forever, I started finding things that caught my interest. 
I needed storage, I needed a place to put my laundry to fold, and I needed a place to hide the dirty laundry when I had clients over for a cut.
Once I figured out what I really wanted for that space, I could narrow down the design.
I loved the idea of taking cabinets all the way to the ceiling. It's my opinion that one can never have too much storage space.
 I loved this stacked laundry basket area. It seems like every laundry system only has slots for three colors. I usually need 4-5. This seemed like a perfect solution.
 And who doesn't love subway tile? Absolutely timeless.
So after gathering loads of inspiration, I put pencil to paper and drew out what I wanted my laundry room to look like.
I was so excited about my plan and I knew hubby could build it. I just needed to convince him it was a good idea!
Thankfully, he loves making me smile, and we tore apart the laundry room once again.
Next I will share the progress we have made thus far, so make sure to check back!


Wednesday, April 13, 2016

A New Adventure-Disney Vacation Planning


 We all have been given a gift, and I don't mean the kind with a pretty little bow on top. I mean the kind that our Father has blessed us with. They are usually seen through our abilities, our strengths you could say, but they can also be who we are in general. Whether it's being a spouse, a parent, a sibling, a teacher, an engineer, or whatever, we all have been given the ability to be someone special.
Some of the gifts that I have been blessed with are being a wife/house-wife, mother, sister, daughter, granddaughter, friend, homeschool teacher, Bible class teacher, part-time hair stylist (a.k.a. therapist), and crafter. I'm sure I am forgetting one. I love getting to be all of these. Some days are harder than others, and the blessings can seem like burdens at the time, but thankfully those days are few and far between.   
Last year, I was able to take some of these God-given gifts and put them to good use. I decided in January of 2015 that I was going to surprise my family with a trip to Disney World, and I would pay for it completely by myself.  I wrote a guest post for Couponing to Disney, where I shared all of the in's and out's of how I pulled it off. (click the link to read the post).
Below are some pictures of the breakfast reveal I did. You know me, I can never do anything simple.

 In the early stages of planning, I realized that the only way I was going to keep my sanity during this process, was to have the help of an official Disney Vacation Planner. 
Friends, Tricia saved me from so much heart ache. I learned so much through her and by following several Disney planning Facebook pages, things began to fall into place. I began to share with others my Big Secret, and they began asking questions about Disney themselves. I was told on several occasions that I should be a travel agent for Disney. I would always brush the thought aside because I was so focused on the surprise I was planning. 
After the dust settled, and the trip was revealed, the thought of being a Disney Vacation Planner kept nagging at me, but I kept ignoring it.
When we got back from our AMAZING Disney trip (more on that later), I had an influx of friends asking all sorts of Disney questions.
Then the opportunity arose.
A call for part time Disney Vacation Planners.
I applied, and I was offered a position.
Things got real...real fast.

I am so excited about this new adventure! I get to help people who are completely overwhelmed by all the details involved in planning a trip to Disney, and make it completely magical and stress-free.
And the best part is that my planning services are completely free!! If you look at the top of the page, you will see a Disney Travel button. Click on that, and you'll find all of my contact information!

I can't wait to share some of our experiences from our last trip, including my first runDisney event, the Princess Half Marathon weekend! 


Tuesday, April 12, 2016

Where I have been...


It's Spring, and I am so glad it's here. It means the weather is getting warmer, the flowers are in full bloom, and the school year is coming to an end. 
So, where have I been the last few months? Obviously not posting here. Homeschooling is where I have been. In this room. Just me, my kiddos, the pups, and the school books. It is all consuming, and it's great (most of the time)!
I love homeschooling. I really do. I am so thankful that we have the means to do so, and live in a country where it is still legal. It is truly a blessing.
But as the weather begins to warm, my spray painting finger begins to itch, and the wheels start turning in my head as to which projects I will tackle first after we close the books.
Today I wanted to share what our homeschool room looks like. 
It's nothing fancy.

Hubby decided that he was tired of all the books strewn throughout the living room, so he graciously gave up his office so we could close the doors on all of the mess if need be. So what you see before you are the remnants of a man cave. (Alabama-everywhere...Roll Tide, y'all) 
I would love to redo a few things...
First-repaint the red wall. I'm over it. However, that would require painting the wall, and I really do hate painting walls. It's just so exhausting. You have to remove all of the furniture, cover the floors, paint the walls, climb ladders, put yourself in very dangerous positions to reach those high ceilings, and then after the paint is on the wall, you have to decide where to put everything again because you really didn't like the original placement to begin with. Exhausting, I tell you. Eventually I will muster up the energy, but for now, I will peruse Pinterest for awesome ideas.

I would also love to add an entire wall of bookshelves where the red wall exists. I love the idea of a home library. That seems to be something of the past, especially with so many people reading ebooks, or listening to audio books. I love flipping through real pages in a book.

I love built in shelves. It gives a cookie cutter home like ours more of a custom look. Here are some pictures of built in shelving inspiration.
 
Love those beams and that ladder!
 

For now, this is what we have in our school room. As you can see, our bookcase is busting at the seams. I have already started double stacking the books because there isn't anywhere else to put them.
#homeschoolproblems

Here is another angle of that side of the room.
We are in Classical Conversations, and this is where I write all of the kiddos' memory work for each week. I made the board last summer, and it has been so useful.  
I love being organized.
So now you know what I have been up to for the last little bit.
I plan on being more frequent in my posts. 
If you follow me on Facebook, you heard my big announcement. I am now an official Disney Vacation Planner. I'll post more on that very soon.
If you click on the Disney Travel button at the top right of the page, you can find more information.

Tuesday, December 1, 2015

North Pole Breakfast with Our Elf on the Shelf

It's December 1st y'all! Where has this year gone?!?
It's a rainy, dreary day, but we're not letting that dampen our Christmas spirits. We have started this Holiday season off with a bang with our Christmas countdown...starting off with the arrival of our elf, Snarf. 
 I am totally not a fan of the Elf on the Shelf tradition. It's exhausting, and you have to be on your A-Game all of December. However, my children love it, and love their elf. They have been talking about him for several weeks now, so I knew I would have to get over myself, and run with it.
We had a North Pole Breakfast waiting on the kids this morning. They think that Snarf the Elf put this spread together...well at least S.R. does. E is in that in-between stage of analyzing whether this actually makes sense, but I can say that he was up at 5:55 a.m. this morning excited to see Snarf at the kitchen table. ;-)
This year we are really focusing on others, instead of ourselves. I have several service projects and "random acts of kindness" activities planned(does that still make it random if I plan it??) Anyway, I found this cute little printable and loved the idea of it. The kids immediately ran to their playroom and started bringing down toys to fill the box. I just wrapped a box with coordinating wrapping paper to make it look a little more festive. The intent is to fill this box and donate it.
 Decorations were either things we had on hand, or purchased from Walmart.

 Hubs made the reindeer donuts. He was quite proud of his contribution. I love that we were able to make this a team effort.
I completely forgot about getting noses for the reindeer. They looked pretty ridiculous without them. Thankfully we had some leftover Whoppers from Halloween. Crisis averted!

On the menu:
Elf Hats(strawberries sitting on banana slices)
Reindeer Donuts(pretzels, candy eyes, Whoppers, and icing to glue it all in place)
Powdered White Donuts
Fruit Cups
Scrambled Eggs
Bacon
Almond Chocolate Milk(soooo delicious dangerous ;-) )

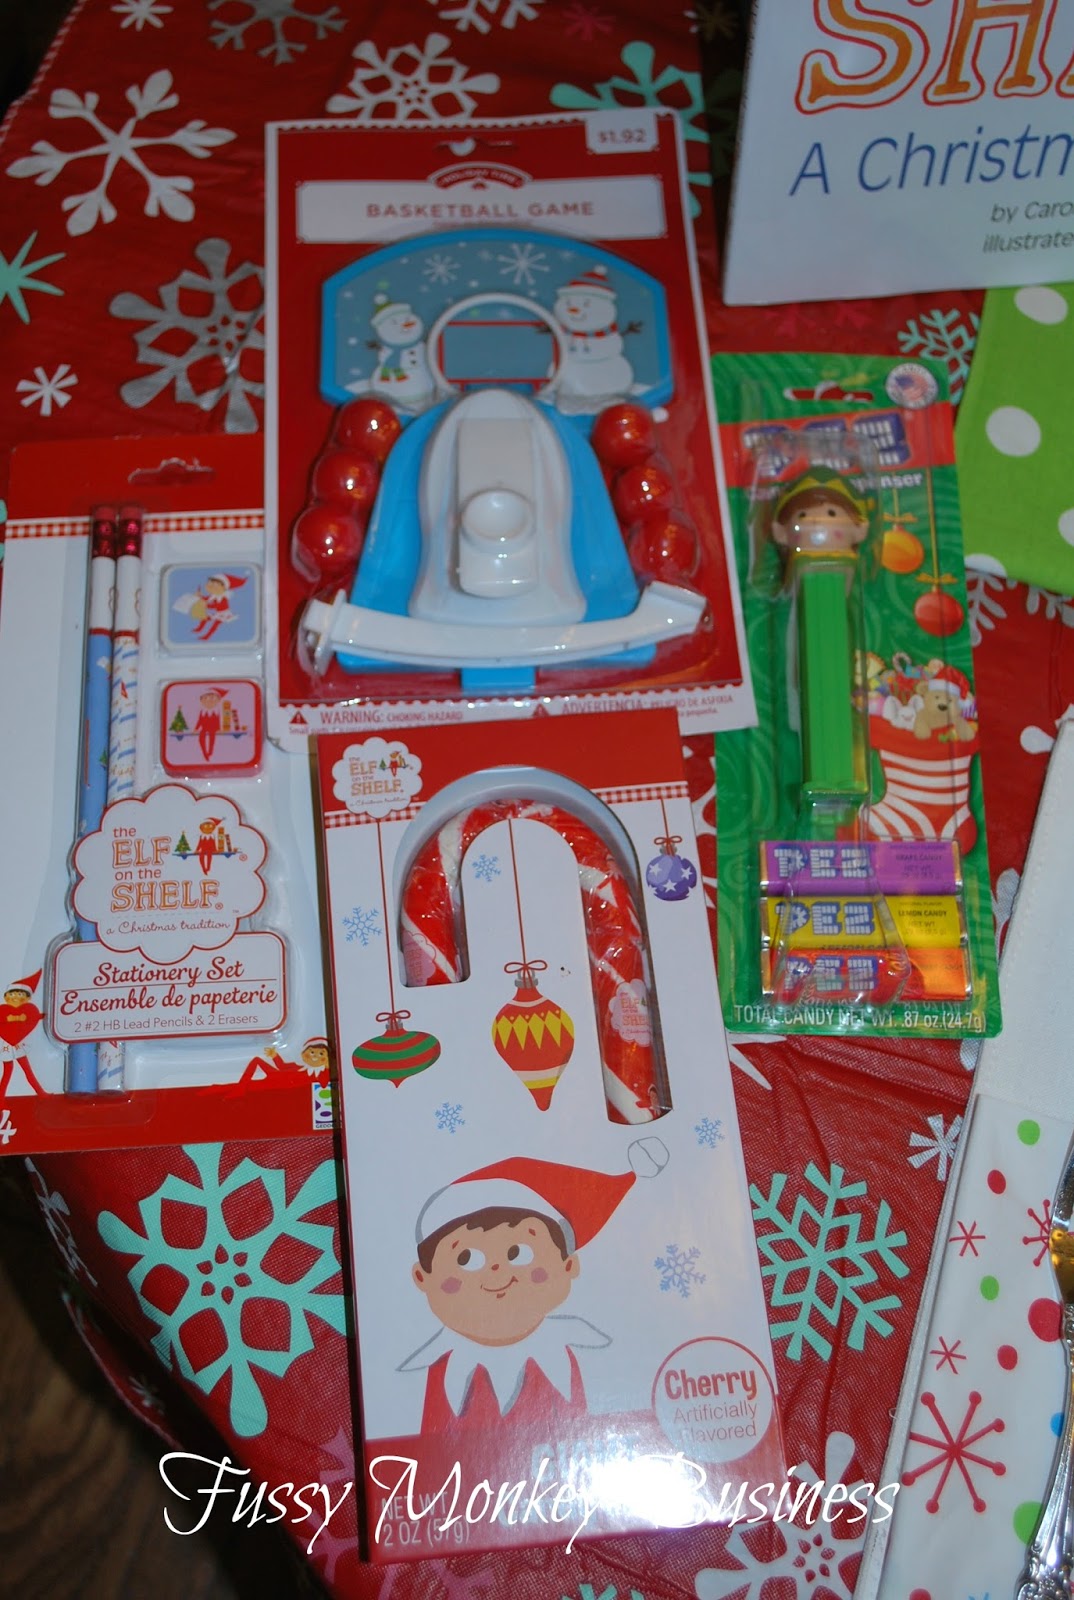
Snarf also brought little gifts for the kiddos.
This was S.R.'s gift.
 And E's gift. All items were purchased from Walmart.
Even though putting this together was a tiny bit exhausting, it was well worth it to see the big smiles when they woke up.
Christmas Magic is in full swing here at the Waggoner home!

Make sure to check back frequently to see what sort of mischief Snarf will be into!