Showing posts with label Christmas 2011. Show all posts

Wednesday, December 14, 2011

Fun Video for Kids

For the past 3 years, my children have received a special email message from Santa.
It's a personalized video that directly addresses your child.

If you follow the link below the picture, you will be taken to the site where you can personalize your message.
Portable North Pole.
The message is the same for everyone, so I let each of my children watch it by themselves, so as not to spoil "the good news" for the other.
My kids absolutely love it, and they don't really remember seeing it from the year before. They do change things up from year to year, though. If you are into this sort of thing, definitely try it out. You will be amazed at how your child's face will light up.

Saturday, December 10, 2011

My Home for the Holidays-Home Tour

I hope that you all are having a great day. I have finally gotten around to taking pictures of my Christmas decorations. About time, right?:o)
I have added a few new things, but most of the decorations are the same as last year. 
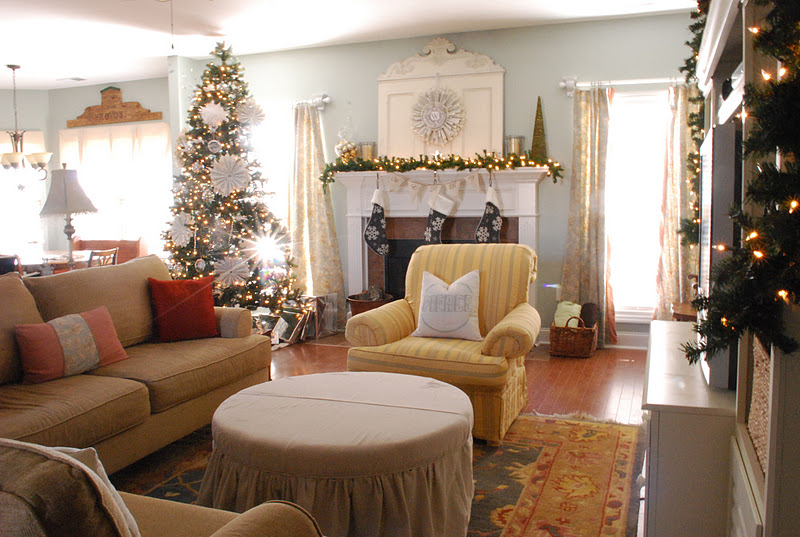
Here is our mantle. 
 The headboard above our mantle and the sheet music wreath are two of my favorite items in the whole house. Me loves them!;o)
The "Merry" pennant banner was made from painters  canvas, twine, stencils & black fabric paint. I have two more hanging in the house as well.
I added a few more paper wreath ornaments to the tree this year. They were left over from my craft booth. I was actually kind of glad I had so many left over. I love how they look on my tree.
I finally got our family pictures in some frames. I still have 6 more that need to be framed..ahh!
This picture is awful, but there is no natural light in this area during the winter months. Anyway, you get the general idea:o)
I got E a new tree this year. I noticed last year that none of his black ornaments could be seen on the dark green tree, so this year I opted for white, and I think it's perfect for his "Star Wars" themed tree.
 "Come to the Dark Side"
 He LOVES his tree, and it's helping us to slowly transition into a Star Wars bedroom. I have a few ideas for his room, but those will have to wait until after the new year.
We put a bigger tree in S.R.'s room this year. The ornaments are the same, so there isn't much to report about this one...other than it's super girly and has little Barbies all over, which she had a fit over:o)
 Did you notice Cinderella on the wall? I don't think I showed you all the "after" when I had her framed. She was an early Christmas present...I couldn't wait to get it on the wall.
Our dining room...I decided to have less fuss in here...more because I am just lazy now:o) Our neighborhood Holiday walk is next week, so the table will more than likely get a sprucing up before then.
I don't think I have shared this new piece with you all..or maybe I have..who knows! Anyway, this hall tree sits at the entrance of the office. It was given to me and I LOVE it. Accept when I smash my knee into it in the middle of the night..OUCH! The hubs has "run" into the same problem;o) 
I hung the kids special stockings on here. These particular stockings hold their letters to Santa...then Santa's elf comes to get the letters and hand delivers them to Santa.
The kids love this little tradition.
 And last but not least, the master bedroom tree. 
I found this tree on a Facebook yardsale page a few weeks back..9 feet and pre-lit for $80. The seller actually turned out to be one of my clients..ha!
I have one more tree upstairs, but it's nothing to write home about.
I hope that you all have enjoyed a glimpse into my home for the holidays. Maybe you found a little inspiration for your own home.
Have a great weekend!
I will have a Ballard Designs Knock Off to share with you all on Monday. See you then!

Participating in:

A Christmas Tree Party

Monday, December 5, 2011

My Home for the Holidays-Cute Hand Towel

I hope you all had a wonderful weekend. We(mostly the hubs) have been busy out in the yard moving dirt, bushes and mulch. It is looking so good in our backyard. I can't wait to show you how it looks:o)

I found a really cute hand towel a few weeks ago made by Mud Pie. The price was really good, but I knew it was something that I could make. I couldn't find their version online, but mine is pretty similar.
 The towel was made from an old shower curtain I found at a thrift store back during the summer. I also had the ribbon on hand. I didn't have enough to alternate the colors evenly, but I think it still turned out pretty cute:o)
 I just cut 28 strips of ribbon at 3" long. (I think the width of the ribbon is 3/4".) I started at the bottom row with seven strips of ribbon folded in half and stitched them to the towel..the next row 6..and so on. 
Just a little side note...if you plan to make this towel, make sure you put your ribbon on at an angle to make the tree form...I made the mistake of putting it on straight up and down and it was totally wrong:o)
A quick and easy...and very festive hand towel for our half bath.


Participating Here

The Stuff of Success

Wednesday, November 30, 2011

My Home for the Holidays-Santa Hat Tree Topper Tutorial

One more day until December! Then the festivities will begin in this household! I am having a girls night in tomorrow night where we will be doing two different crafts and just hanging out. I can't wait!
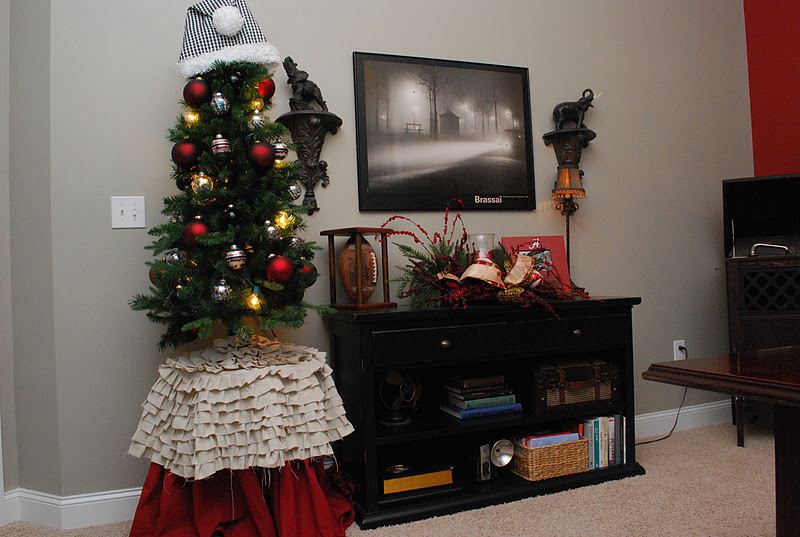
I have been trying to put a few finishing touches on the house before tomorrow. I thought I would put a houndstooth hat on top of the hub's tree in the office, but being the cheap-o that I am, I decided to make a topper.The hubs suggested I make a Santa hat. Such a smarty he is:o)
So that's what I did.
Here is a quick tutorial on how to make your own Santa hat.
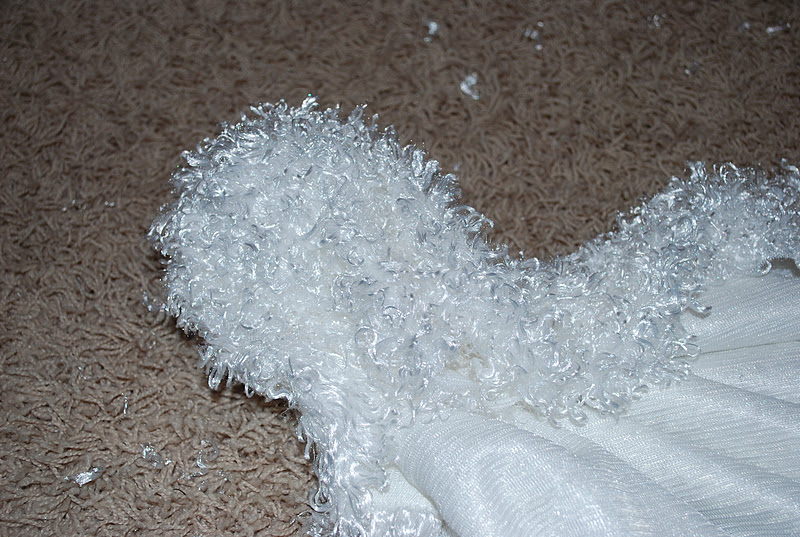
Start out with your choice of fabric for the body, fuzzy fabric for the pouf at the end and for the trim around the rim of the hat, and a Styrofoam ball.
 I had to add these pics in here...Scosche was spazzing while I was cutting the fabric...do you think he got weirded out over the fuzzy fabric:o)
 Isn't he such a sweetie?
 Back to business:o)
I folded the fabric in half and cut at an angle. The base of my hat is 20".
 The length is 16.25". There was no rhyme or reason for those measurements...that's just how I ended up cutting it...just a side note. I didn't cut the top into a point. I cut it with a blunt edge. There needs to be room at the top to slide the fabric covering the ball into.
 Next lay your foam ball in the center of the fluffy fabric.
 Wrap fabric around ball, like so...and cut, making sure to leave enough fabric to hold onto.
 For the hat, put right sides of fabric together and stitch a 1/2" seam. Leave the end open so that the fluffy fabric with the ball inside will have a place to go.
 Tie the fabric off really tight that is holding the ball and slide it through the top of the hat. Using a really tough upholstery needle, stitch the pouf(fluffy ball) to the top of the hat. 
 There will be excess fabric, so trim that off.
Like this.
 This particular fabric doesn't fray, which is fantastic because there is no need for hemming! For the brim of the hat, I cut a 3" wide strip of fluffy fabric.. You will need to measure the brim of your hat to make sure of the exact length...making sure to add enough for a seam allowance. 
Stitch the ends of the fluffy strip together.
 Then stitch the band around the edge of the hat making sure that right sides are together.
 And voila..you have your very own Santa hat tree topper.
 Easy peasy:o)
 I hope you all have a wonderful Wednesday.
I look forward to sharing all the fun things we are doing for the month of December, so stay tuned!!!


Participating Here: