Friday, August 30, 2013

Front Porch Fall Decor

 It's Friday!!! 
Yay for 3-day-weekends, and yay for football season kicking off. 
We have a busy weekend ahead of us with lots of food, friends and football. But before all of my guests arrive, I have a long list of to-do's. 
I can check the front porch off the list though. It's done. For now at least. 
We have a tiny front porch...I'm not even sure you could really call it a front porch. It's more of a pass through. 
It's not big enough to have big beautiful displays like the front porches below:
 source unknown
source unknown

However, it looks barren when nothing is there. 
Everything has to be small in scale when decorating this porch because I want my guests to feel welcome at the front door, not claustrophobic.  
I couldn't really get a good full scale picture of the porch. The brick wall kind of takes up the picture, but in person it's much more inviting...I promise:o)
And, yes, I did just water the plants before taking the shot. It looks like my pumpkins got a little excited;o) Guess this photo won't make it to Pinterest;o)
The mums really make the bench pop, and keep it from blending in with the massive boring brick wall behind it.
To try to keep things symmetrical, I brought a small teak chair from the backyard, and used it as a plant holder. The old granite ware pitcher has holes in the bottom of it, so it makes a perfect planter now.
I will most likely be adding more pumpkins and a possible mini hay bale, but that's where I will have to be patient. The pumpkins aren't quite ready, and we'll have plenty of pumpkin farm field trips to collect those:o)

Partying Here:

Crafty Confessions

Wednesday, August 28, 2013

Painting a Pillow

Is anyone else being hammered by hot temperatures right now? Even though it's blazing hot here in the South, it hasn't deterred me from working away on Fall decor. I'm so glad you are back here today with me. I have a little tutorial on how to spruce up a plain burlap pillow using stencils and fabric paint.
 I found this image on Pinterest
I fell in love with the pillow and thought "how fun would that be on my new bench". 
If anyone knows the source of this photo, please let me know so I can give them credit. Thanks!!
So I gathered all the supplies I needed. 
A pillow form(purchased), burlap(purchased), stencils, black fabric paint, and paint brush. 
 I made the pillow cover, and added a zipper. I am really into adding zippers to pillows because it makes it easier to clean the covers. If you are able to do it, I would highly recommend it!!
After the pillow cover was made, I taped some paper to the width of the cover and traced the letters on the paper to see what it would look like on the pillow.
One word...dumb.
These are the only letter stencils I have, and they were waaay too big for the pillow, and waaay too swirly. I could barely read what they said. So I nixed the "Fall Greetings" idea and searched through other stencils I had.
 I found this one in the stash. Obviously it's been used before, but I can't quite remember for what..oh well:o)
I centered and taped the stencil to the burlap cover and painted away making sure not to push the paint under the stencil. If you have some spray adhesive for stencils, that would work great, but we don't use that fancy stuff around here...we just stick to the trusty old Scotch tape:o) 
Here is the finished stencil. Now you should wait until the paint dries before inserting the pillow form...or be like me and go ahead and put it in anyway:o)
And here is my new pillow on my new bench. The hubs keeps telling me I need to bring the bench back inside because it's too nice to be outside..he's so sweet. It's staying put for now:o)
I plan on sprucing this little area up some more with mums and pumpkins...can't wait to finish that up and share the final reveal.
On another note, say a little prayer for me. I go tomorrow to have a scan on my gallbladder. It's been acting wonky, and I have been feeling sub-par for the last 3 weeks. I'm hoping the doctors will find that it's only the gallbladder and get that sucker out of me. I'm ready to feel normal again!


Monday, August 26, 2013

Fall Centerpiece

About two weeks ago, we had a little cold spell. The humidity was gone, and the weather was perfect. Just enough chill in the air that you had to grab a light jacket in the evenings. We actually built a fire and roasted marshmallows a couple nights in a row. It was wonderful!
Now we're back to the sticky-wearing-the-outside-weather..blech!
That cooler weather made me want Fall here in a bad sort of way. Fall is my most favorite time of the year, and I love decorating for it. Even though it's still August, I'm busting out the pumpkins, y'all!
September will eventually get here, Lord willing, so it's ok to have the pumpkins out, right?

Last Christmas, I used this planter for our center piece, and filled it with the same greenery, but just added Christmas-y stuff.
I wasn't sure if it would work for Fall because it was so green, but it seems to be working. 
The pictures are slightly over exposed, so the green is screaming right now, but in person, it's toned down:o)
 I found all of the little add-ins at Hobby Lobby.
 The sprigs and pumpkins are 40% off right now.
 I've had this little wire pumpkin for ages. Another yard sale find. It's the baby. Momma pumpkin is outside sitting beside the newly made-over bench
Oh yeah, I almost forgot..I made the table runner too. It's made from painter's drop cloth. I had a little extra leftover from a project I did for VBS. There was just enough length and width, thankfully. My other table runners were too skinny. I wanted this one to stand out, and not be hidden under the planter. I plan on fancying the runner up a bit, but that will be another project for another day.
I will have more Fall decorating and tutorials in upcoming posts so make sure to check back!

Friday, August 23, 2013

Old Bench Makeover

I started playing around with picmonkey.com today...yep, I know I am behind the times. 
I'm going to have lots of fun with this new-to-me site! Notice the B & A collage picture...well it's more like A & B because I'm new to this collage making business. I'll get the hang of it...eventually.
Anywhoodles, today I am sharing a little bench makeover. 
This little guy was a yard sale find. It belonged to a little old man, and he used it as his work bench. As you can tell from the top, it got lots and lots of use. He passed away, and his wife had no use for it, so she sold it to me for $1. 

I'm really digging the painted furniture with the wooden tops, so this bench seemed like the perfect piece to try out that technique.
The top & sides of the bench seat had a thin veneer surrounding MDF. The seat had to go because, well, just look at it. It has seen better days. The 90's ivy green paint was definitely an eye sore as well. 
But there were good bones, and lots of hidden potential.
 Since I wanted the base to be white, I primed it with Valspar Primer from Lowes. Between coats, I had to rush the bench back inside because the humidity in the South is at 1000% right now. Terrible conditions for spray painting.
After the primer dried, I sprayed 2 coats of Valspar flat white paint. The reason I used flat was because that was what was sitting in the spray paint basket:o)
While the paint was drying, I worked on the bench seat. We had some leftover 2x6's from a previous project, and I cut them down to size. 
Then I used pressure treated 1x2's to brace the underside of the seat. No reason for pressure treat..just had that in the scrap stash.
The top was stained with a walnut stain. 
To keep from having to apply multiple coats of stain and waiting 3-4 hours in between coats, I let the stain sit on the boards for about 5 minutes before wiping away the excess.
That technique worked perfectly for me. I've never been known for my patience;o)
Once the stain had dried, I attached the base to the new seat. The power drill wouldn't reach inside the tiny holes for the screws, so I HAND screwed it to the seat....good thing I don't have carpal tunnel...yeesh!
I'm so pleased with the results, and I love how the wood grain pops on the seat. 
This bench will reside on our very miniature front porch. I can't wait to dress it up for fall. I have some really fun decorating projects in the works for fall decorating. 
Here's a sneak peak of one of. Make sure to come back to get inspired for your fall decorating!


Partying Here:

Wednesday, August 21, 2013

Burlap Wreath Tutorial

I.am.ready.for.fall.
Since Fall is around the corner, and I have a few spare moments with the kiddos back in school, I have been able to catch up on some decor projects I have been wanting to tackle.
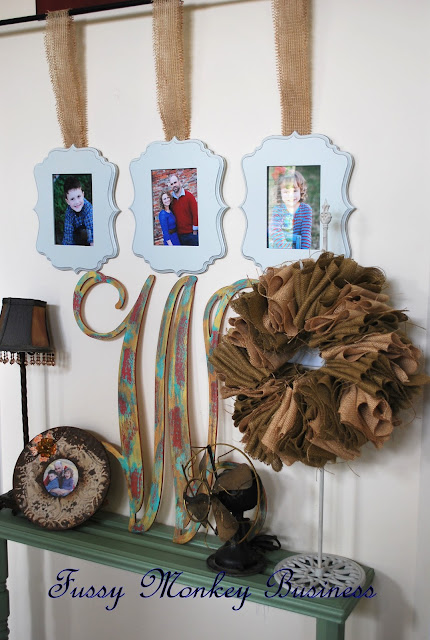
One of them being a burlap wreath. 
You can't have Fall without a burlap wreath. It's in the rule books somewhere...I'm sure of it. 
There are so many different styles. Raggedy, bubbly, smooth, etc. I went for more of a shabby look...sounds better than raggedy, right?
Today I'm sharing how quick and easy this project is.  
Your list of supplies:
3 yards of burlap(I used two colors)(Burlap is $3.99 at my Hobby Lobby. I used a 40% off Q)
Wire hanger(Joan Crawford would die)
Needle Nose pliers
Scissors
Tape Measure
Start off by cutting your strips. I cut mine at 5" wide.
Then you will want to straighten out the wire hanger.
 Once all of the burlap is cut, do a fan fold. When finished, you will roughly have a 5x5 square.
Thread the wire hanger through the square. 
 While threading, the wire hanger was flopping around. This was driving Max bananas..it was fun to watch;o)
After all of the burlap is threaded onto the hanger, twist the ends together. I ended up snipping about 3" off of each side.
Twist it all together as best you can.
Flip, and hang on a wreath stand.
This project took less than an hour from start to finish, and was less than $10. Easy peasy. I'll have some more step by step fall decor coming your way soon!


Tuesday, August 20, 2013

Drawer-Turned-Bathroom Shelf

School is back in session here, so I actually have time to sit down and do some posts. I realized today that there are several projects that I talked about on Facebook, but never posted about them, so I 'm going to have to get with it:o)
Speaking of Facebook, the LEGO Table has been unbelievably popular. Y'all have been blowin' up my feed! It's already more popular than my Menu Board...cuh-razy!
So today is all about this cute little shelf that's hanging in our newly remodeled half bath.
This is where I started. I found this drawer, along with another on the side of the road when I was on my way to drop S.R. off for preschool last year. The hubs wasn't happy about it, so to the attic it went and sat for over a year. 
I've seen a lot of drawer-to-shelf makeovers here lately but I really didn't know where I would put one until I was in need of a shelf for the bathroom. Awesome!
 I was not about to sand this piece down because I didn't know what kind of paint was on the drawer, nor did I know how many coats there were....now I do..there were 4 coats people! Yowza!
I used a paint stripper that I purchased from Lowes. I have never used it before, and even though the directions said WEAR A MASK,  I didn't listen. If you're going to use paint stripper, WEAR A MASK! The fumes are horrendous, and you feel like you're lungs are on fire. I thought that by having the garage doors open, that it would provide plenty of ventilation...um, that would be a big fat NO.
So, lesson learned.
 This stuff worked pretty quickly, thankfully. 
 What are those dark spots inside the drawer? Mashed bugs...gross, I know, but I figured if this stuff could strip paint, it would definitely strip a dead bug...and it did;o)
 My original intent for this shelf was to spray paint it after getting the paint off, but after applying two different coats of the paint stripper, I decided that I really liked the way the older colors were popping through. I gave it a light sanding, and then had the hubs add the shelf because I was having a time with getting it level. I spray painted the shelf white, and distressed it a bit for attaching it to the drawer.
I found the robe hook at Walmart and the hubs added that as well.
This is such a neat shelf, and adds a lot of character to this small space.
So who's going to go dumpster diving and find themselves an old drawer? If you decide to take on this project, I would love to see how yours turned out!

Partying Here:


Monday, August 12, 2013

Half Bath Makeover

We put the finishing touches on our half bath this weekend. I am thrilled with the end result. It's definitely more my taste than the "before".
I found my inspiration from The Lettered Cottage. I absolutely looove their blog, and if you haven't checked them out yet, you should really take the time to do so. You'll be glad you did. 

I get so excited every time I walk by this room.
This was the before. Chocolate brown, and it looked like a hole in the wall...literally.
We are putting in an in-home salon because I am a hair stylist, and one of the requirements is to have access to a bathroom from the salon area. Thankfully, the half bath is right beside the area we will have the salon. The hubs cut out the drywall, and made an opening for the new door. He made a brace above the frame to make sure everything was stable. 
                                                          This view is actually taken from the laundry room, where the salon will be. The laundry room is next on the to-do list. I'll probably do a step by step of that room because there will be some MAJOR changes in there.
 Once the door was in place, the hubs started adding the horizontal wood planks. The hubs and I debated on whether to make our planks go vertical like the inspiration room, or to do horizontal. Cost was the winning factor, so we chose to go horizontal. We went with the 
 cheaper version, instead of what we used in the kids' bathroom. If we do this in any other rooms in the house, we will be using the pre-made stuff. It's not nearly as cheap, but it's definitely more mechanical engineer friendly;o) 
Most bloggy DIY'ers were using a nickel to space their planks, but we went with a dime. Just a personal choice...
This shelf is one of my faves in the room. In it's previous existence, it was a drawer.
 I found the drawer on the side of the road about a year ago. A true trash to treasure makeover. Later this week, I'll share the steps I went through to achieve the final look.
My original intent was to strip the paint off of the drawer and repaint it. After stripping most of the 4 coats of paint off, I decided to stick with what was left on the drawer. I loved the vintage look of the chippy paint.
 We added a robe hook to the side of the shelf to hang a towel on. By keeping the towel off of the wooden planks, it will hopefully keep the boards from getting as wet, and having those nasty drip lines running down the wall. 
This light fixture was a Lowes purchase. I wired it myself...I felt kind of pumped afterwards;o) The mirror was also purchased from Lowes.
In the inspiration bathroom, they used wallpaper at the top of their walls. I am quite fearful when it comes to wallpaper. It tends to go in and out of style, and I have yet to hear of someone who just LOVES taking it down when it comes time to change. This is the second time in 4 years that I have redone this bathroom, so I went with something a little less permanent...stencils. The stencil was purchased from Hobby Lobby. It took me 4  PAINSTAKING HOURS  to do this tiny space. I hated every.single.minute.of.it. Like for reals. I'm so glad that I stuck it out, though. It turned out exactly how I had hoped.
This is the new door leading to the laundry room. Looks like it's been there the whole time, doesn't it?
I'm so glad to have this tiny space complete. The hubs and I had a few moments where we felt claustrophobic, but our hard work paid off!!
Here's a list of the items we purchased, if you're interested.
Oval Mirror-Lowes
Light Fixture-Lowes
Soap Dispenser-Marshalls
Towels-Marshalls
Robe Hook-Walmart
Stencil-Hobby Lobby
Wall Color on Planks-Wedgewood Grey-Benjamin Moore
Basket-Walmart

Make sure to stay tuned to see how I transformed the roadside drawer into a shelf!


Participating in:


_


Creations by Kara