Hey Everybody! I am so excited to get this week started with the Christmas crafts the kids and I have been working on. I hope you enjoy them as much as we do.
I tried to come up with different crafts by using items that either came from the Dollar Tree or were $1 or less.
Today we'll start with a Snowman ornament.
Here's what you'll need to get started:
-Wooden Round disk..found ours at the Hob for 67 cents, I believe, in the clock making section.
-Craft paint-White, Orange, and Black(already had on hand)
-2 Spools of Ribbon (1 for "scarf" and 1 for hanging the ornament)
-Glue Gun and Glue sticks
-Scissors
-Craft Foam, red & black(had on hand as well)
-Craft glue
-Paint brush
You will need to paint the wooden disk first with the white craft paint. Then mark out with a pencil where the eyes and smile go.
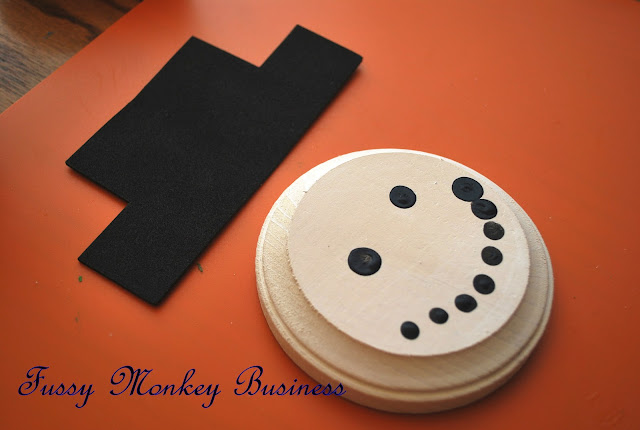
Let your little ones use their fingers to put a black dot on each spot you marked with a pencil.
Just small little dots
It should look something like this:o)
Next you want to cut out a hat from the black craft foam. I folded the foam in half lengthwise, sketched out a hat, and then cut it. Just trimmed a little here and there to make it look even. You'll also want to cut out some red for the "ribbon" above the brim of the hat(see pics below), and attach it to the hat. You'll want to do this BEFORE you put the hat on the ornament. I did that part backwards and had to remove the hat while the glue was still wet.
Squirt a little glue on the top of the Snowman head, and attach the hat.
It should look like this when you're done.
I painted a little carrot nose on his face. You can let your kids do this, but mine are still a little young to wield a paint brush:o)
Next is the scarf. I used ribbon I already had. I tied a knot, and trimmed the ends on an angle. I attached it using my hot glue gun at the Snowman's chin.
Once everything is dry, you can flip it over and attach ribbon to the back so that it can be hung.
This is what our Snowmen looked like when they were finished...so cute!
Make sure to come back tomorrow!! I'll be sharing Christmas Angels using some very interesting materials:o)
Participating here:


1 comments:
What a fun project to do with the kids.
Post a Comment