Tuesday, August 24, 2010

Day 2-Minnie Mouse Skirt & Ears Tutorial


I hope that you all had a great Monday. Yesterday was E's first day of preschool. He did great. I did great until I had to leave him. S.R. and I both cried when we got in the vehicle:( She cried b/c she wanted to stay at "pwe-skoo." I cried for the obvious reasons. He was unsure about being there, but when I came to pick him up he was all smiles.
So anyway, on to day 2 of Disney Week. Today I have the bottom half of a Minnie Mouse outfit. I have a white t-shirt to go with the skirt. I am going to have it monogrammed soon. I am sharing 2 tutorials today. For the skirt and the ears hair bows. The bloomers are a pair of shorts just like the Snow White shorts, but I ran elastic thru the cuffs of the legs and added the eyelet trim. L-O-V-E It!

Here's what you need:
Skirt:


-2 Coordinating Fabrics
-Elastic
-Thread

Hair Bows:


-Black Felt
-1" Grosgrain Ribbon
-Extra Thin Ribbon(not sure the measurements on the small ribbon)
-Thread and Needle
-Stick Pin
-Hot Glue Gun and Glue Sticks
-Alligator Clips

Directions on the Skirt:

This skirt measures for a size 3T. Make your adjustments accordingly. Cut 8 4"x11" strips from the red and 8 6"x11" strips from the black.
Next, you just start sewing the long sides together, alternating colors. If you have a serger, that's great. If not, make sure to zig zag the edges to cut down on fraying. I did a straight seam first, and then a zig zag stitch.
Once you have sewn all of the pieces together, connect into a complete circle. 

Press. Try to get all the seams pressed down in the same direction. This will help you later when running the elastic thru the casing. For the hem you will need to press 3/4" down and fold it under again and press to hide all raw edges. You will want to do the same for the waist, except fold down  1", and turn under, hiding all raw edges.
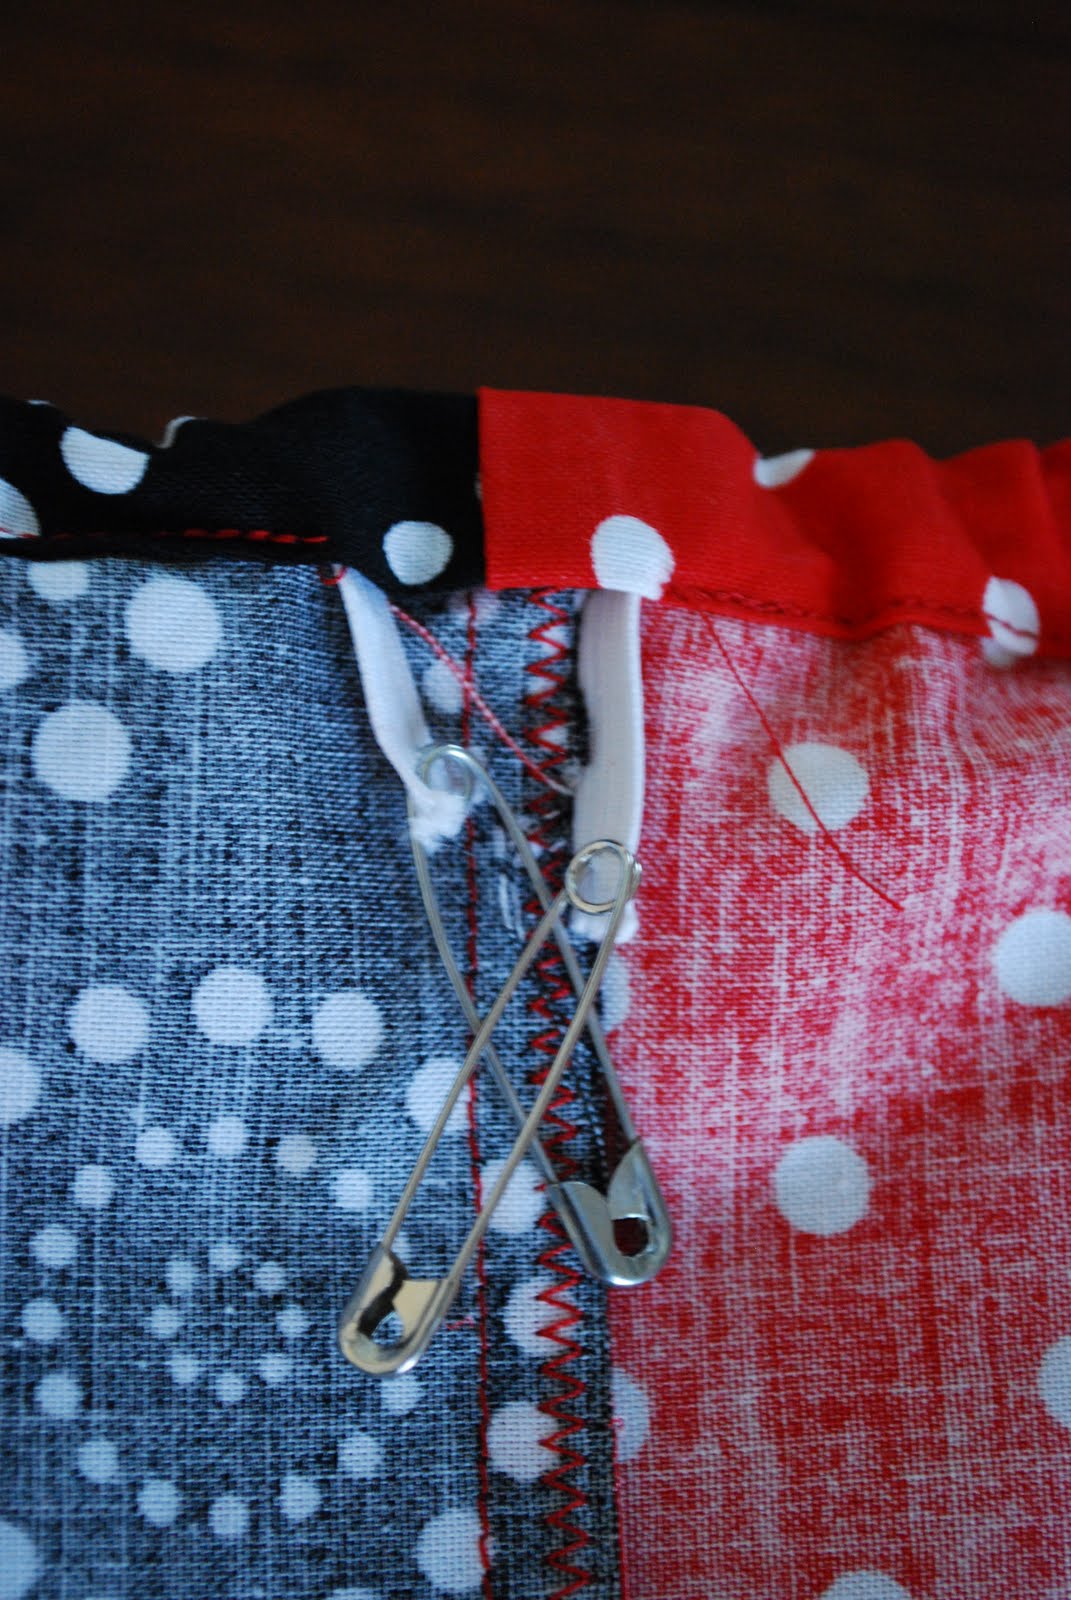
Stitch a seam all the way across the hem as close to the edge as possible. On the waist, you will want to leave an opening to run your elastic thru. Cut the elastic to the desired length. Put a safety pin on each end, and run it thru the casing.

Sew the ends together, making sure that the elastic hasn't turned, and stitch up your hole.
For the tulle skirt underneath, I just folded over the fabric ran a running stitch all the way down 1" from the fold. 
 Run the elastic thru and then sew up the seam. There was some excess, so I just trimmed the bottom when I was finished. Tulle doesn't fray, so no hemming:o)
Now for the ears:
Here is a pic of the supplies:

Make yourself a circle pattern. I used a circle cutter and it is 2 1/2" in diameter. Pin to felt, and cut 2.
Now here comes the tricky part. I will do my best to explain how to make the hair bows, but you may be better off searching online for some tips:o)
I made a 2" hair bow, so fold the ribbon over itself until you have this:
Can you see that there is 2 loops on each side? Now flare those pieces out...
Take your needle and thread and stitch that into place. Tie it off. Then wrap the thread tightly around the ribbon to make it look like this:
Make sure to tie that off as well. Now comes the fun part...hot glue...get ready to get singed;o)
Take the thin ribbon and place it in the center. 
Place a small dot of glue on the back and wrap the ribbon around the thread. I know the picture looks like the ribbon is already wrapped around, but it isn't:o) I wound the thread around several times, and the flash bounced off of the thread.
Glue the bow to the circles, and then glue the circles to the alligator clips, making sure to have the clips facing opposite directions. 
And that's it:o)
Ta-da
And because I love you all so very much....I am giving a pair of ears away to one lucky reader:o)
Just leave a comment on this post, and I will announce the winner on Friday! Have a great day my lovelies!!
Giveaway is Closed.

Sunday, August 22, 2010

Snow White Outfit


We are going to Disney World soon, and I can't wait!!!  We took the kids last year on sort of a whim, and I was not prepared for what was about to take place(I had never been before). It was MAGIC. The absolute best vacation as a family....EVER! We decided that we wanted to relive the experience. 
We have actually been planning this years trip to Disney, and I started to see all the cute little outfits people are dressing their sweet ones in to visit this special place. I have been checking out Etsy, and there are a lot of great things on there. It's almost overwhelming because there is so much stuff.
So I wanted to spend this week showing you some of the outfits that my children will be sporting while we are vacationing....maybe give you a few ideas on what to dress your little ones in next time you are at Disney;o)
Being the thrifty one, I decided that I would make ALL of S.R.'s outfits.  This Snow White outfit cost me 75 cents...only because I ran out of red fabric, and had to make a run to Walmart.
Don't mind the arm:o) I was in a hurry before church and was running out of day light:o)

Now I can't take full credit for this idea. The kids were in a summer music class and one of the little girls in the class had a shirt on similar to this one. Her mother makes them and sells them on Etsy. At first when I saw how much she was charging for them, I almost flipped. But after making the shirt I now understand....the sleeves.
These puppies take FO-EV-UH. Cutting the strips(I tore mine....did you know that you can tear fabric in a straight line...saves so much time) Sewing them together, and then cutting them into sleeves. I used a pattern on hand, and the fabric was scraps left over from previous projects. I had to do some fanagaling to have enough for the shirt. But I made it work. 
S.R. loves her new Snow White outfit. She squeals every time she sees it:o) Makes me happy:o)
Here's the whole outfit again...

I did purchase some hair bows on Etsy...the kind that are shaped like the Princesses. Hoping to receive those in the mail this week. S.R. will flip when she sees them:o) May hold off on showing her them until time for the trip;o) 
On Tuesday I will have a tutorial on how to make Minnie Mouse Ears Hair bows, along with the matching skirt. 

Saturday, August 21, 2010

Disney Week Coming Next Week

We will be heading to Disney World soon, and so I will be making a lot of new clothes for the kids to wear. Next week will be Disney Week. I am really excited about what I am making:o) There might even be a tutorial or two:o) Hope you will share in my excitement:o) Stay Tuned.....

Monday, August 9, 2010

A Winner, and A Bathroom Reveal

Let's start off by announcing our winner of the $60 giveaway to CSNStores.com.....Drum Roll Please......
The Winner was #4-Mandy!!! 
Yay for Mandy!
I have sent a CSNStores.com representative your email address,so be on the lookout for you winnings!!
*******
And now for the reveal of my latest makeover. We live in a new house, and we have slowly been making it a home. It has taken me longer than I had expected to be able to pick out the right colors, and figure out what design style to work with in this house. In the last house we used dark colors, and it was nice and cozy. This house is much larger and wide open. I wanted to go for the more beachy, cooler colors, so that it would keep the appearance of being wide open. But I did want one room that was dark, and that was my half bath. It's a big change and was almost frightening. I went to Lowes to get some paint. I had every intention of trying out Olympic paint because it has been advertised at $17 a gallon. Much better than the $30-something for Valspar. So anyway, I picked out my color, headed to the paint counter and realized there was some oops paint. There was a gallon for $5 that was extremely close to what I had picked out, so I dumped the paint chip and grabbed that $5 gallon...SCORE!! 
Here is the before:
and another angle:


Very Contractor-y blendy....does that make any sense???
Anyway, here are some After pics:
Without the flash...

With the flash...
Because there aren't any windows near by, there wasn't any natural light to help with the picture taking:(
A picture I picked up from Hobbly Lobbly for $5
The face plate for the light switch and the towel ring also came from H.L. All 50% off:o) The towel will be replaced with something much prettier, but will have to do for now.


I love old books....these came from the hubs' family farm.


I have a plan for the hooks on the bottom of this shelf. Hoping to work on that sometime this week...might be a tutorial in the making:o)

Really needing this verse here lately:o)

So here's the before again:
After


 Not bad for $5, eh? Got another makeover up my sleeve...it involves bead board...that's all I'm sayin'. Have a great Monday!!!

Wednesday, August 4, 2010

Fabulous Giveaway to CSNStores.com!!(Giveaway Closed)

CSNStores.com has graciously offered one of my lovelies the chance to win a $60 gift card to one of their 200+ stores. I have been checking out their upholstered headboards, and you won't believe their selection. Here are some of my faves from their site:
I love this one. Very cool!

                                     
Can you believe that this is an INFLATABLE Headboard??? Who would have thunk?? And it's a great price too!

I really like the print on this one. It's super chic!
Are you digging these lines on this headboard? The fabric color is Chocolate....how could you possibly go wrong with chocolate;o)
But I'll have to say that my absolute favorite headboard would have to be the Lexington Long Cove Southampton Panel Headboard.


Simply Gaw-jus;o)
As I have told you before, CSNStores.com offers a myriad of items thru their 200+ stores. No matter what you are looking for, they have it.  They have furniture, housewares, lighting, grills, and even things for your little one(Christmas will be here before you know it;o)). They even offer school supplies. I know that's on a lot of your minds this time of year. Definitely check them out!!!

So how to enter the giveaway:
-Leave a comment, as many as you please. 
I would love it if you would become a follower as well:o) Good for the ole ego;o)
Anyway, this giveaway is open to U.S. and Canadian residents only. You have until 7:00 p.m. on Sunday, August 8th to enter. Good luck to you all!!
This Giveaway is Closed.
p.s. I think I will wait to reveal the bathroom on Monday:o)

Tuesday, August 3, 2010

Tuesday Tutorial-How to Make a Topiary


I love topiaries. I think they add just that extra touch to a grouping. I have never bought any because I always thought that they were a little pricey. Well now I know why:o) More on that in a minute...
I have been eyeing these topiaries in the Ballard Design catalog for quite a while now.
Each one starts at $19 and goes up to $29. I am not willing to pay that. I am cheap. I know that about myself. So I thought I would try to make one. I have had the stuff to do it for a few days, but couldn't find the time to sit and put it together until 5 a.m. yesterday...yes you read right...my wonderful son woke up at 4 A.M. hollering for me, telling me to come here right now. When I finally made it to his room, stumbling, trying to walk straight since my legs were still in bed, he informed me that he wanted Daddy???? WHAT!! After making sure that he understood that everyone in the house was asleep but us, I tried to go back to sleep....after an hour of tossing and turning I decided to head to my craft closet. I saw all the supplies for the topiary lying on the floor and thought why not tackle this now, with no interruptions. So here's what you need.
-1 Styrofoam ball (I used a 3" ball, but you could use a smaller one)
-Greenery, get the good stuff. Mine came from H.L. and it was $15.99 BEFORE the 50% off sale.
-Patience
-Hand Saw
-Tree
-Small Pot
-Styrofoam for pot
-A little green stuff for inside the pot
Pull or cut off pieces to stick down in ball. The greenery that I purchased was nice b/c the pieces just pulled right off of the stems. They were between 3" and 4" long. I just shoved them down in the ball....didn't use a glue gun, just shoved them in far enough to stick. Make sure to keep the pieces fairly close. This will take about an hour:o)
When you have neared the end, make sure to leave a space for your stick. You will find said stick out in your yard. This is where the hand saw comes into play. 


Find the nearest tree that has some firm branches about a half inch thick and are somewhat straight, and hack it off. Force it in the bottom of the ball, making sure to put it in straight:o) Place Styrofoam in the bottom of the pot, and force the other end of the stick in the foam.Cover the base of the topiary with moss. I had some sitting in another basket, so I borrowed some from it;o) The pot was something I had in the backyard with a dead plant in it. I just spray painted it and it was good to go.


I really like how it turned out. This topiary cost less than $10 to make, but it was time consuming, so that may be why these things are so stinking expensive:o)


I think it works nicely on the mantle. I have plans to make a sign to put in front of the headboard. I just need some old wood....got any?;o)


Well that's it for Tuesday Tutes....my "Powder Room" is almost complete. I found a lot of good stuff from H.L. today. Just a few more finishing touches before the big reveal.

Monday, August 2, 2010

I'm Back

Hello my long-lost lovelies:o) Hopefully you haven't forgotten about me...I haven't forgotten you. I have been extremely busy these past few weeks, as I am sure that you all have been too. Trying to squeeze in a few more activities before the new school year starts. My little man will be starting preschool this year...sniff, sniff. He's so excited! He thinks he is going to kindergarten;o) Little does he know that he still has 2 more years before that happens. THANK GOODNESS!
Anyway, I have been working on a few projects over the last few days. I had been taking a little hiatus from the crafting world, but I'm back at it again. I started on our half bath on Saturday. Heading to Hobbly Lobbly for some accessoriztion today. I'm hoping to share the reveal tomorrow or Wednesday.
Here's a little something that I did while on said hiatus. A sippy cup holder for a friend:
This is some fabric that I have had for about 2 years. I made E some jon-jons with it when he was a wee one. They were so cute on him:o) Anyway, hoping to have a tute lined up for you guys tomorrow, so maybe I won't reveal the bathroom until later on this week. Is that wrong to change my mind in the middle of a post?;o) Have a great Monday!!!