Showing posts with label sewing projects. Show all posts

Thursday, July 2, 2015

How to Dress Up Thrift Store Finds

Hello Friends. 
I hope you all are having a fine Thursday. 
Since it is Thursday, you know what that means. It's time to share my finds from thrifting.
And while we are on the subject of sharing....
I asked for your prayers on Sunday for my sister, Heather. She's pictured below with myself and our daddy.
Last Saturday, she was about to get ready for a family dinner to celebrate her 28th birthday, when she experienced three Grand mal seizures back to back.
I will spare you all the horrific details, but in the process of seizing, she dislocated and broke her right shoulder, and shattered her left shoulder and has a tear. 
She's still in the hospital, and is on lots of pain medication for the shoulders. The doctors are keeping her seizure medication pretty high, so that when she has her shoulder surgeries, she won't seize while under anesthesia. 
She is being transferred to a different hospital for the shoulder surgeries either today or tomorrow.
Apparently she has been experiencing partial seizures since she was a child, and we never knew it. This was all a complete shock.
She is in really good spirits, but that's just who she is. She is always making lemonade outta lemons. She's a blessing to anyone she encounters.
 So since she will be unable to raise her arms for quite some time, I ran over to the closest thrift store to find enormous men's button down shirts for her to wear. 
Now, if you have been following me for very long, you know that I always have to jazz things up a bit.
Since men's shirts aren't supposed to be flattering on women (because they're MEN'S shirts), I figured I'd slap a few monograms on them, so she could be comfortable AND cute ;-)

This was the last of the shirts I worked on, and I believe it's my favorite. This was an OOPS that turned out even better than I planned. I was pulling the pocket off with my seam ripper and ripped right through the shirt..AHH! I was so mad, I had to walk away.

 I came back after a full night's rest, and made a new pocket, patched the hole, monogrammed the pocket, and attached it to the shirt. Love!
Heather loves her some Vanderbilt. This shirt was a no brainer. 
Anchors and Vandy go together like milk and cookies.
 I used glitter fabric with this applique, and I think it's awesome...just sayin'.
Now this shirt, I think is my least favorite. 
Another one of Heather's loves is 'Merica.
She's all about the Red, White, and Blue. So I thought I would make her a festive shirt.
It didn't turn out how I had planned....she may want to set this one aside for when she turns 65.
To me it looks like a Granny shirt (no offense to you Granny's out there). 
 If anything, she can wear it at home when she has absolutely no where to be ;-)
 My sister is also a HUGE baseball fan. She lives and breathes baseball. I was in charge of her phone on Sunday to handle all calls or texts. She got a bazillion updates from her ESPN app..no joke. She was heavily sedated, but was still watching a game on the television in her room. 
So since she's so crazy about baseball, I figured I would make her one that she could eventually dress up with maybe an undershirt, and some cute jeans to wear to the next game she attends.
 Total no-brainer ;-)
 I love the colors of this shirt. Hubs was kind of upset that he didn't end up with some of these(minus the girly monograms). I'm sure he'll survive though ;-)
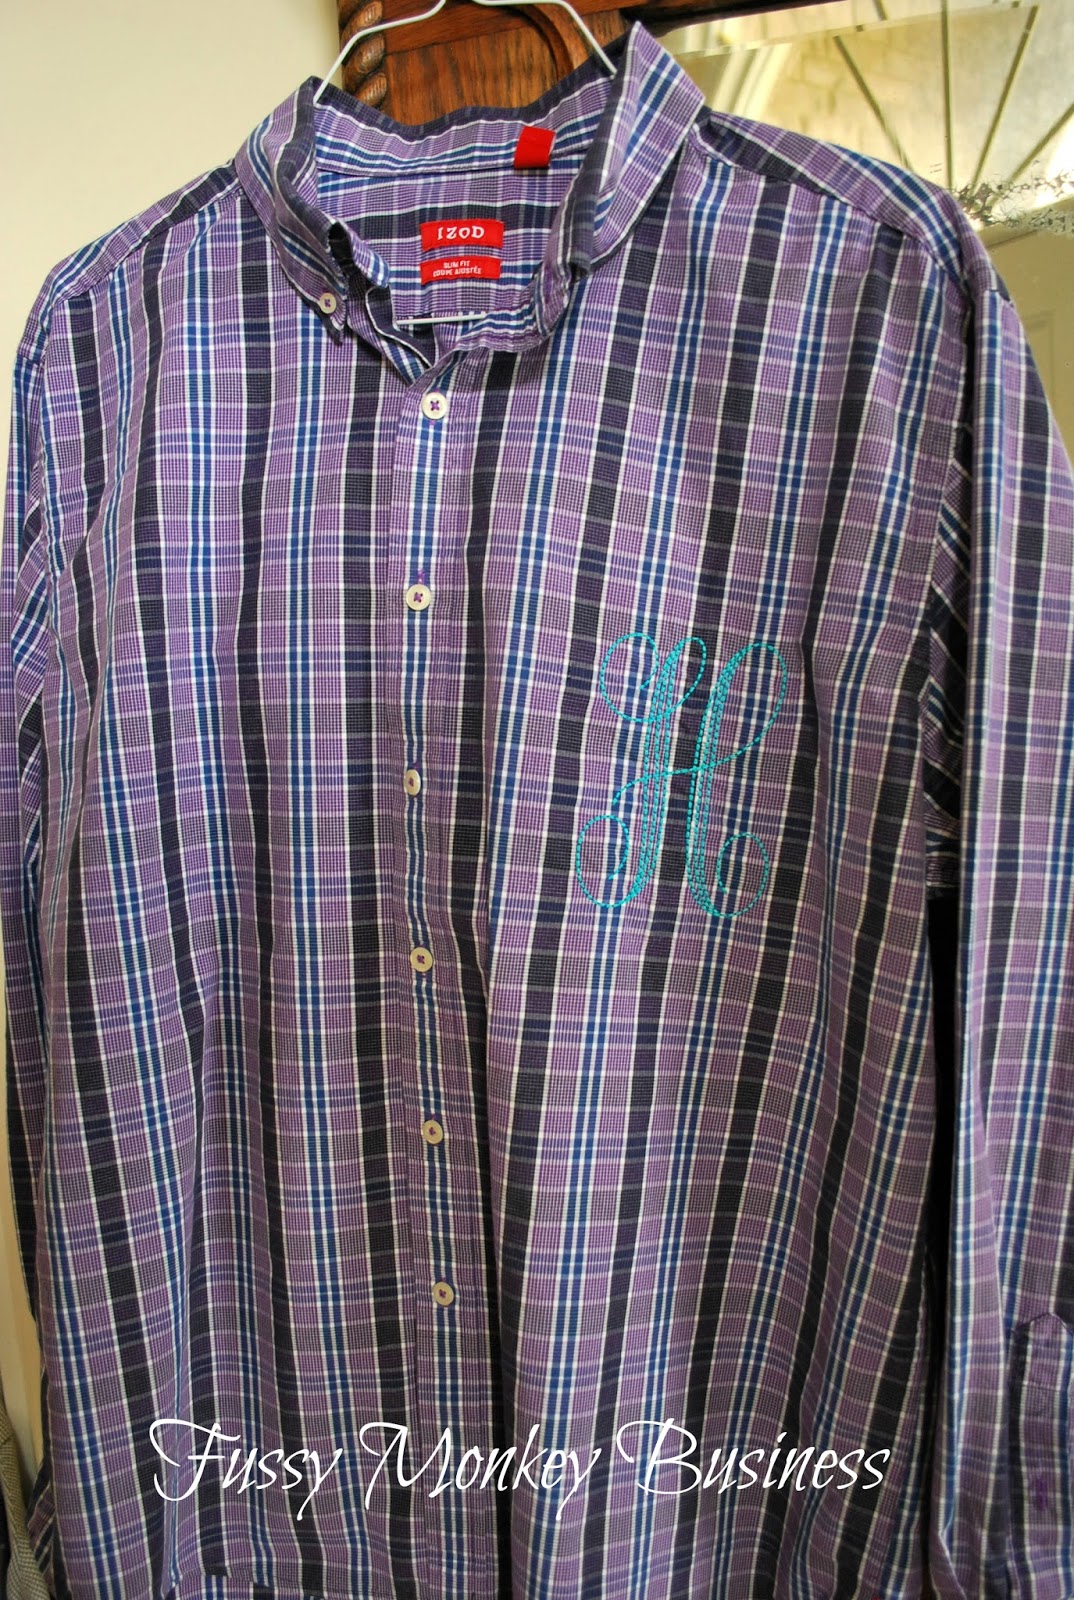
 The turquoise doesn't quite show up on the plaid, but if you look really close you can see how pretty it is!!
And there you have it. Those are the shirts I'll be taking up to her so she can get a break from the ugly hospital gowns. Hopefully she'll be able to slide her arms in them without any pain.
Prayers on her behalf are still coveted and appreciated. 

On another note, I found this old Sunbeam mixer bowl at another thrift store for $1.50 last week. 
It's heavy, and perfect for housing fruit.
I recently cleaned out my kitchen and reorganized the counters and this bowl was a perfect addition. I'll share more from my kitchen soon.
 For those of you who are joining along in the hunt for thrifty finds, please shoot me an email or message me on Facebook with your finds. I would love to share your awesome deals with the rest of my readers!

Wednesday, April 16, 2014

Easter Happenings

Hey Y'all! I have fallen off of the blog postin' train once again. To tell you the truth, I haven't really been all that motivated when it comes to crafting, and D.I.Y.'ing...GASP!! 
I know, right?
The horror!
Well, I have been working on our "school room" a.k.a. our bonus room. It's been a work in progress for 4 years now:o) Anywhoodles, it's FINALLY organized, so now I can pick a paint color, paint, build, paint, pull my hair out because of all the painting, decorate, and get hair implants to replace the ones that I will most likely be pulling out:o)
I have been up to a few other things as well. If you follow along on Facebook or Instagram, then you already know that I got a new sewing machine.
IT'S.DA.BOMB.
Just sayin'.
It is an embroidery sewing machine, but it does soooooo much more than my last one could ever dream of doing. Speaking of my last machine, it found a new home last Friday. The lady who purchased it from me was beyond excited to get it....if I weren't so jazzed about the new machine, I might have felt a little more sad to see it go.
So with this new machine comes lots of fun! I have been able to monogram and applique to my hearts desire. I have made some gifts for my kiddos and for a few others as well.
I made some fun shirts for the Giant Easter basket. 
Why, yes, my Easter basket is finished. BAM!!
Am I always on top of things like this..Nay, I say!
 The Giant Easter basket was used for our Easters as kids. My mother gave it to me to use with my kids, and I think it even came with the "original" plastic-y grass....it's probably laden with some nasty form of BPA;o)
Anyway, here's a closer look of the shirt for E. We're BAMA fans in this household, and if you don't know what RTR means, not to worry. "Roll Tide Roll" is what that stands for. What does "Roll Tide Roll" mean? 
I have no idea. 
I am a BAMA fan by proxy. The hubs cheers for BAMA, so that means I do to. No sense in borrowing trouble;o)
For some reason the thread looks orange in this picture, but I promise it is a deep crimson red...roll tide.;o)
I didn't get a good close up of the Anna shirt for S.R., but if you visit my Facebook page, you can see one there. 
I appliqued a dress for S.R. today. I'm thinking this will be her Easter dress. Last year's dress was much fancier, but I don't have fancy in me this year.
And it's not like she'll remember that 2014 was the year that mommy decided to get all kinds of lazy and not make a fancy dress.
This one will do just fine!
I may make E a bow tie to go with his new $2 yard sale suit he got last weekend. Yes...I said 2 bucks for a really awesome little boy's suit. It fits like a dream and he looks adorable in it!!
************
 So with great machine comes great responsibility. 
I am officially selling monogrammed and appliqued items, and to kick things off, I am hosting a sale. You can head over to my Facebook page to see what items I have to offer for applique. If there is something you'd like but don't see, message me, and I will see what I can come up with!

Tuesday, January 28, 2014

100 Days of School Projects

Are you all staying warm? We are making a go at it. 
We got a little more snow this morning along with a 2 hour delay for schools because of the frigid temperatures. What a weird winter it has been this year!
Today was class picture day, so I grabbed a quick shot of the kids with the snow. Can you tell they were freezing?!
Last week, the kids hit a milestone for the school year. They hit the 100 day mark. To celebrate, they had projects for homework. Gotta love it, right?
E had a Krispy Kreme doughnut hat that he had to glue 100 items on. He decided to be a parrot. We glued the feathers on, and colored a picture of Blue off of Rio...I know he is a blue macaw, but it worked for what we were doing. Unfortunately after gluing all the feathers on, we realized that the hat wouldn't fit his big noggin'. 
But he still looked cute!
 S.R. wanted to make a baby doll blanket for her 100 Days project.
She actually helped out quite a bit in making this blanket.
 She got this sewing machine for Christmas, and was super excited to finally get to use it.
She did a great job keeping a straight line, too!
 The quilt has 100 circles, in case you were wondering;o)
They were very proud of their projects and grateful for the help I gave them. It always makes my heart proud when my children show gratitude!
And speaking of projects, I am finally tackling the playroom. We are turning it into a home-school room for next school year...yep, you read right. We will be homeschooling...ahh! 
So, there are a lot of projects that need to be done, and I am going to hopefully get most of them accomplished before school ends for the summer.
I'll share what all we have planned for the room in my next post.
Until then, stay warm!!


Wednesday, January 22, 2014

Monster Doll Tutorial


Cut List
Head- 5 1/2"x 5 1/2"(2)
Neck- 3"x 2"(2)
Body- 8"x 8"(2)
Legs- 11"x 2 1/2" (4)
Arms- 9"x 2 1/2"(4)
Mouth-I used some scrap chevron I had lying around.
Eyes-2" 2 Circles from white fabric and 2 from felt with adhesive(found at Hobby Lobby)
1/4" seam allowance throughout the entire project.
You will also need Lite Heat Bond, and Black Fabric Paint


Finger press the head to find the center.

Place the eyes near the crease.
Apply the eyes and mouth using the heat bond and your iron.
Once it has cooled, take it to your machine and stitch to secure.

Next stitch the neck to the bottom of the head.
And then the neck to the body.
You will repeat the previous steps for the head neck and body for the backside of the monster as well.
Press necks seams inward.
Now, you will need to mark off the areas where the arms and legs will go. Measure 1" down from the shoulder and mark. Then 1 3/4" down from the first mark, as shown below with red dots.
You will do the same for the legs, 1" in and 1 3/4" apart.
Stitch front and back of monster with right sides together, making sure to back stitch at each dot, and leave the openings for the arms and legs open.
The bottom will be left completely open so you can stuff it at the end.

Turn right side out and press.
Stitch arms and legs together leaving one end open. 
Stuff the arms and legs.
You will then attach the arms and legs to the body. Make sure to pay attention to which are the arms and which are the legs:o)
Once you have attached them, you will stuff the head and body of the monster.
When you have it where you want it, then stitch the bottom up.
The last thing you will do is to color in the eyes with the black fabric paint. I used a 1/2" circle and decided I wanted the eyes to be a little wonky.
E was so happy to get a monster, and he now sleeps in his bed and helps to keep the "real" monsters away!
Will you be making a monster to keep the "real monsters" away?

Monday, January 13, 2014

Sewing Projects-A Tooth Fairy Pillow & Monster Doll

We had a very laid back weekend. The kids officially started their basketball season on Saturday. I wish I had pictures to share, but I don't.  I am coaching both teams, so I couldn't keep up with my big ole wonkin' camera. I got a few with my camera phone, though. 
The kids play back to back, so it's fairly exhausting to scream for 2 solid hours. We had fun...but after all that excitement, afternoon naps are usually on the agenda...for me that is;o)
Today I want to show you some of the sewing projects I completed last week.
I made E a monster doll. I will have the tutorial up in a few days. It was a simple project. Nothing but straight lines. He loves it, and that makes for one happy momma!
 I also made S.R. a tooth fairy pillow. You can find the tutorial here. The instructions are easy to follow, and you can bang one out in no time.
 The tooth fairy pillow was made just in time too. S.R. lost her first tooth Saturday evening. She fiddled around with it all day...even during her basketball game, which I thought was kind of gross. Kids are gross, though. Anyway, she came running and shrieking at the top of her lungs out of my bedroom, nearly giving me a heart attack, until I realized they were happy shrieks:o)
She was so proud to finally lose her tooth.
Our tooth fairy brings $5 for the first tooth because it's a BIG deal to lose the first one. She also brings gold $1 coins for the subsequent teeth.
So what does your tooth fairy do that's special or unique? I would love to know. It's always interesting to hear other families' traditions.
I also want to take a moment to say thank you for the kind words expressed by some of you over my last post. It was difficult to write, and even more difficult to hit the "publish" button. Thank you for being so sweet and encouraging!

Monday, January 6, 2014

Riley Blake 'Dress Up Days' Doll Kit-Somewhat finished...

If you remember back in the summer, I made S.R. a new quilt. She loves her room, and I always feel so proud when I walk by and see that quilt sitting on her bed...when the room is clean, that is.
I purchased the Dress Up Days doll kit (which matches her bedding) and had intentions of making the doll for Christmas. S.R. even asked me to make her a doll for Christmas. Well, time flew by, and I didn't get a chance to make it. 
Since our Christmas break was so laid back, I was able to take the time to construct it.

I made a few modifications to make it more personal.
I added felt hair and little bows on top. 
I haven't made the dresses to go with it just yet. I purchased a second hand serger a few months ago, and I wanted to make the dresses on it. I am really excited about this machine. I have wanted one for a few years, but they have always been way too expensive. A friend of mine was selling this one at a great price, so I couldn't pass it up.
While it isn't being used, it will be resting here. Notice the painting? My sister painted it for me. It was my Christmas present from her. It's the Northern Lights. Didn't she do a great job? I love personal gifts so much more than store bought stuff.
It matches really well with the decor in my craft room too.

E wants me to make him a monster doll, so I have to figure out how to make one. I also have some tooth fairy pillows that need to be constructed. We're about to get a few visits from her very soon!