Showing posts with label Girls Birthday Partu. Show all posts

Friday, March 2, 2012

Sneak Peaks...

As promised, I am sharing a few sneak peaks from S.R.'s birthday party.


I just finished decorating ruby red slipper cookies. I have a few finishing touches with the party decor, and then I have to start scrubbing the house.
Some of our party guests will be arriving tonight.
I can't wait to share the entire party with you all. Have a great weekend everyone!!!

Saturday, February 25, 2012

Wizard of Oz Mini Coloring Books


I am hard at work putting the finishing touches on The Wizard of Oz birthday party. The house has started to transform into Munchkin-land...it's actually really neat looking:o)
Since I am on a strict budget right now, I am trying to come up with inexpensive and free favors.
I am not usually one for handing out coloring books, but most of the girls attending love to color.
I found a site, Kids-n-Fun.com, that has a great selection of W.o.O. color sheets. I copied and pasted them in Publisher to turn them into a mini color book.
Here's how I did it.

Supplies you need:
Blue & white gingham paper cut into 9.25"x6" sheets(folded in half)
Scissors
Print outs of Pages 1, 2 & Cover
Double sided tape
Sewing Machine
 Start out by printing your color sheets. To make them double sided, I printed page 1 first. I then laid the printed side UP into the printer with the Tin Man going in first...see pic below...& then printed page 2.
 
Once you have printed your pictures, fold into quarters with Dorothy being the first.

 Now trim very carefully across the top of the folds.
 Make sure to leave just a snippet in the very center..this will make it easier to keep everything in line when sewing the seam.
 Now fold it back in place. Line the middle seam of the gingham paper and the middle seam of the color sheets together, and run a basting stitch down the center. 
 It should look a little something like this.
 Adhere the Cover to the front, and you're done!
 A quick, easy & super inexpensive party favor.
I'll share their goody baskets very soon..they are adorable!!

To download each page, click on the links below.


Tuesday, January 10, 2012

Little of This, and a Little of That

I am finally back to normal again...well normal for me, that is:o) What a doozy that virus was! Phew!
Anyway, with this new found energy, I have been Mrs. Domesticate for the past few days. I have been cleaning, organizing, meal planning and party planning. The hubs has walked out of the house with a warm meal in his belly and a packed lunch for the past two mornings..oh yeah, he's getting spoiled...I better quit while I am ahead;o) Juust kidding:o)
I have been in the mood to redecorate something, anything really. However, we are still working on the backyard, so I am having to channel all of my DIY energy into the Wizard of Oz party I am planning for S.R.
By the way, she calls it the "Lizard of Oz"...LOVE IT!

For this party, I have been instructed that I will stick to a budget...a much smaller sum than what I have spent on previous parties...OUCH! 
I fully intend to stick to this budget, and I will possibly even share what that budget is and a break down of what I spent with you all..

 I am having to get extra creative when it comes to decorations and party favors since we had the "party-budget talk." 
I wanted to share a few things that I have picked up within the last few days.

You can't even imagine how excited I was to find these little ballet slippers at Walmart in the After-Christmas discount toy section. I had to go to 4 different Walmarts to get the 6 pairs I needed.
These favors have been the most expensive purchase so far at $4 a pair...not bad, huh...actually I got one pair for $3...I am not exactly sure why, but hey, I'll take it:o)

One of the real surprises about these shoes is that they have a little opening in the back, so hopefully everyone will be able to fit their little piggies inside:o)


 These little pups are the stand-ins for Toto. I can't seem to find a cute little black dog anywhere that is affordable, so these will do just fine. I found these little cuties at the Dollar Tree. I had to dig to find 6, but I only had to hit up one Dollar Tree store for these:o) 


The blue and white gingham fabric was a Walmart purchase. It is $2.72/yard at the one I frequent the most. I purchased 3 1/2 yards, and I am going to be making all of the girls aprons. I found a child's apron on sale at Kohl's the other day for $3, and I am going to use it as my template. 
I hope to have a full tutorial on that when they are completed.

I have a few other things, but they aren't anything to get worked up about...yet;o)
I hope you all are having a great start to the week.
I need to get off of here, so I can continue my duties as Mrs. Domesticate, and clean up the mess I made making peanut butter chocolate cupcakes before the hubs gets home:o) 

Saturday, March 12, 2011

Barbie Birthday Party Decorations-Part 2

Whew! This party was so much work, but I think it paid off. Everyone had a fantastic time, especially the birthday girl and her mommy;o)
We couldn't have asked for better weather either!!
Here are the pics of the rest of the party.

Food Table
The new cakes. I decided to be bold and go for a two layer cake this time. I think it turned out really cute. I am definitely a fan of fondant. 
All the "little" party guests got their own personal Barbie cake.
Here is a close up of a few. These proved to be slightly more difficult. I used store bought icing and it didn't want to stick to the dolls. I'll have to come up with something different next time...
if there is a next time;o) 
They still turned out pretty cute though:o)
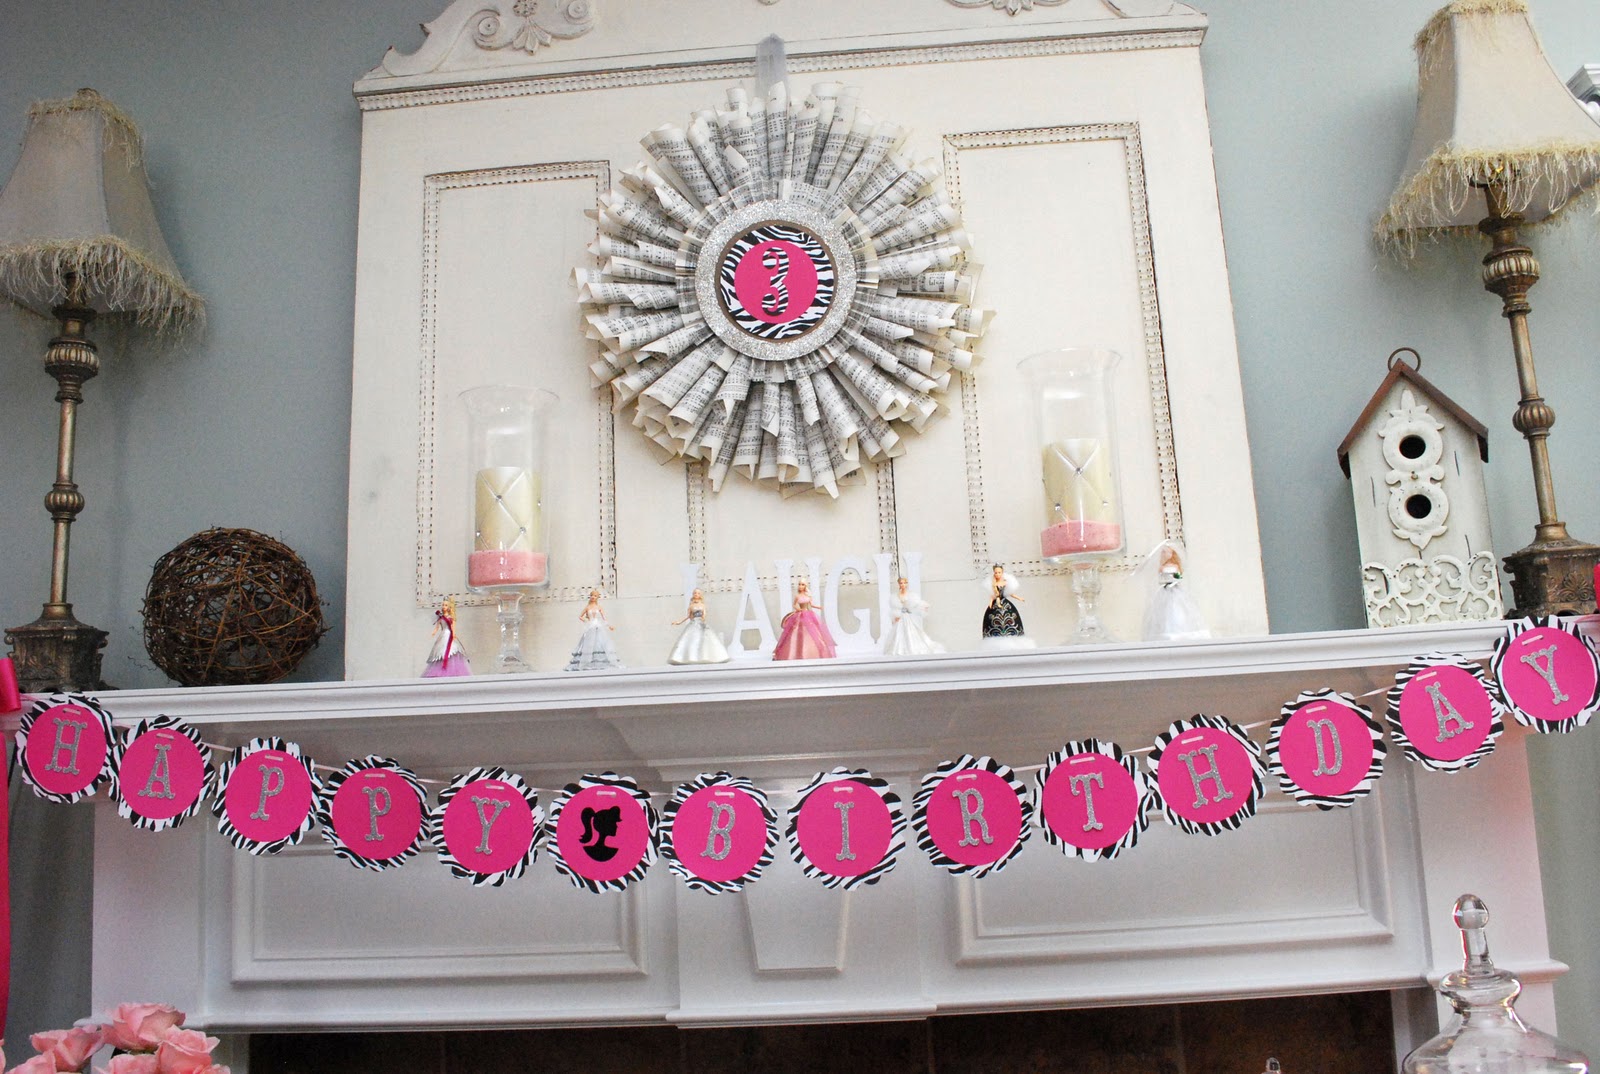
Another shot of the mantle. I was so excited with how the banner turned out. SUPER cute!
I have been collecting the Hallmark Barbie ornaments since they started coming out with them in the 90's. I pulled out a few that had coordinating dresses:o)
Here is the party favor table. 

All of the mommies got to take something special home. 
I found a recipe for Pumpkin Spice Sugar Scrub at Under the Table and Dreaming. Stephanie also provides the labels to print out.
The girls got these little goodies in their bags along with a full size Barbie.  

The coffee table was our designated gift area.  

The hubs picked these roses up from Costco yesterday. They always have the most beautiful flowers there.
Here some on the craft table.
The girls had 2 crafts to work on.
The first was a beaded necklace. They required some help from the mommies, but the girls seemed to enjoy them.
The second was the picture frames. I spray painted these frames ahead of time and asked each of the girls' mothers to email me a profile picture of their daughters.

I printed the pictures out on card stock and had the mothers cut them out while the girls were decorating the frames.
And this is how they turned out.
Aren't they cute?
This is probably the most successful party that I have hosted. It was a lot less stressful since the numbers were lower, and I seemed to be ahead of things as well. 
This made for one happy little girl:o)
and a happy mommy!!

If you missed out on the other posts, here they are:


Participating in:


The Girl Creative

Thursday, March 10, 2011

Party Outfit

This is what Miss S.R. will be wearing at the party on Saturday. This isn't what I had intended for the outfit to be, but I think it turned out really cute. The shirt was actually supposed to be a skirt, but I didn't make it right. I guess that's what I get for making something on the fly when little bit is down for a nap:o)
When she tried the skirt on, she hated it. So I thought, maybe I could put some straps on it and call it a shirt. Well it worked:o)
Can you tell I love ruffle pants?:o)
She just looks so cute in them!!
There is a possibility of some monogramming but we'll see how much time I actually have:o)
Lots of cleaning, hair cutting, and baking going on today. 
Have a great Thursday!!!

Tuesday, March 8, 2011

How To Make an Inexpensive Flower Arrangement

I told you all that I would share a quick tute on how to make these flower arrangements. You won't believe how simple and fast these are to make.
Here is what you need:

Flowers(obviously) I already had these from last years party.
Styrofoam Balls..these can be found at the Dollar Tree in a 2-pack
Container..mine came from Hobby Lobby and they were 67 cents each
Hot Glue Gun

First step..pop all the flowers off of their stems.
Next, place your Styrofoam ball into your container
 Glue your first row of flowers all the way around the perimeter of the container. If you want this to be removable, then place the flowers slightly higher and make sure that the glue doesn't drip onto your container.
Continue gluing until the Styrofoam disappears.
 And that's it! I told you that it was simple:o)
Here's a neat idea, and one that I was going to use, but decided not to...these arrangements could be used as place card holders. Just glue a name card to a thin dowel rod and stick it down in the Styrofoam ball:o) 

Stay tuned tomorrow for some free printables!!

Monday, March 7, 2011

Inexpensive Party Decor Using Tissue Paper

Today I want to share with you some different ways to use tissue paper when decorating for a party.
When I started decorating for this Barbie Birthday Party, I noticed that the pink and zebra stripes were not exactly coordinating with my home decor:o)
I started taking everything down and realized that I needed to replace the artwork with something. That's when I came up with this idea.
Just cover up the existing art.
All you need is:
Good Tissue Paper(thick)
Sticky Dots, or other removable adhesive
Scissors
Ribbon
Craft Knife
And any other accessorization
 Start off by putting your adhesive along the entire edge of the glass. Lay your tissue paper down and smooth it out along the edges. Use your craft knife to remove the excess paper.
 And it should look a little something like this.
Quick side note, you can iron out MOST of the wrinkles in the tissue paper with an iron set on low, and no steam....do this BEFORE sticking it to the glass:o)
 Lastly, add any embellishments that your little heart desires:o)
The silhouette was created using my Cricut {love} and the Forever Young cartridge.

When the party is over, all you have to do is remove the paper.
How easy was that?
Another way to decorate with tissue paper is to make pom poms. Martha gives a great tutorial on how to make these.
And lastly, the "ceiling medallion"
This only requires 2 pieces of tissue paper. You use the same fan fold as the pom poms, but fold them separately. Fan them out and tape the ends together. Then tape it to the ceiling. Add ribbon to the bottom to give it a more finished look.
Can it get any easier or cheaper?
Let me know how you decorate with tissue paper. I would love to know!!