Tuesday, October 23, 2012

Facebook Updates

Hey Guys! Just a quick note. If you want to stay up to date on what I'm posting on Facebook, here are a few simple steps to keep "in the know."
1. Click on the Fussy Monkey Business Page
2. Click on the gear symbol next to the "Liked" button
3. Click on "Add to Interest Lists"
(see picture below)
That way you never miss a post:o) 
Stay tuned for a tutorial on how to can applesauce...you won't believe how awesome my house smells right now!!! And how easy it is to do!!

Monday, October 15, 2012

Getting Crafty-A Fall Party

Fall is here, and I love it! Whenever there is a new season, I feel the need to have a party. 
I invited a few of my girlfriends over, and we had a fall crafting party. Since it was in the afternoon, I kept the menu simple, and just made desserts.
We had S'more CupsPumpkin Maple TrifleCaramel Corn, and strawberries. I also made some delicious apple cider that made my house smell wonderful.


 For our craft, we made owls. I found the inspiration at The Diary of Daves Wife
I got all of my supplies from Hobby Lobby.
 Here is a candid shot of the girls hard at work...punching, mod podging, and painting away.
 And another shot of them hot-gluing the ribbon on the backs of the owls.
 Their owls turned out really cute, and they were all proud of what they came up with. I love it when they leave with smiles on their faces;o)
Here is a shot of mine.
 They were so easy to make, and it was so fun to sit and gab while crafting the afternoon away.
When everyone left, they got to take home a jar of homemade apple butter.
I can't wait to have another crafting party. It's good for the crafting soul;o)
I'll be sharing some more sewing projects throughout the week. I can't seem to stay away from my sewing machine for very long...I'm lovin' it!!

Friday, October 12, 2012

Patina Monogram Tutorial-Sisterbug Monograms Product

My friend Kera, from Sisterbug Monograms asked me a few weeks ago if I would be willing to get creative with some wooden monograms. I always jump at the chance to get my craft on, so of course I said YES!
So then, I had to come up with the perfect finish....what's a girl to do? 
A couple of years ago, before Pinterest(WHAT? There was a time before Pinterest?), I ran across this really awesome tutorial at Brassy Apple on how to do an aged paint technique.
I knew that this would be the perfect paint treatment for my gi-normous "Dub-Yuh."  
Today, I am showing you the step-by-step process that I went through. 
The monograms come in a natural finish..or to us country folk, "not done up".;o)
 So because they are un-finished, you need supplies to make it even more awesome.
For your supply list, you will need:
-Acrylic paints, I used 4 in all
-Sponge Paint Brushes
-Dove Bar Soap
-Sand Paper
-Blow Dryer(to make the paint dry quicker) &
-Paper Towels

The four colors I chose were Metallic Red, Turquoise, Mustard Yellow, and Brown.

I chose the metallic red as my base coat. 
After painting the entire letter, sides and all, I used my blow dryer to speed the drying process. A great trick for those of us who are extremely impatient...of course, I have never heard of anyone who actually enjoyed watching paint dry:o)
Once the paint was dry, I rubbed the bar soap in random places. These are the spots where the red will shine through.
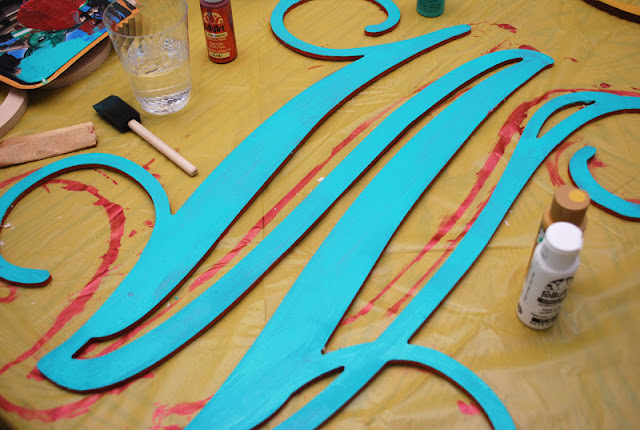
The next step is to paint with your second color. I chose turquoise. 
I used the blow dryer once again to dry the paint.
And then I sanded the areas where the soap was applied. You can see where the soap is, even though it's been painted over. If by chance you can't, you can just run the sand paper over the entire letter, and the paint will pull up really easy where the soap is.
Now, I thought about leaving things as is. It looked fine with just the red and turquoise, and some of you are probably saying, "Girl, you should have left well enough alone." But, I decided to add in my third color, mustard.
 I rubbed more soap on the turquoise areas, and then painted the mustard yellow around all of the red.
 Here is a closer view of what I am talking about. It doesn't look all that fantastic, which is perfectly fine, since this is supposed to be an aged painting technique:o)

 After the yellow dried, I sanded once again. 
The colors were still a little too stark for me, so I decided to continue the aging process.
 That's where the brown came in. I simply dabbed a paper towel into some brown paint rubbed it on, and then immediately rubbed it off.
 In this picture, you can see that the left side has been "dirtied up" a bit, and the right side has not.
 And here is the final product. An aged "W" or dub-yuh, as they say down here in the south.
 To give you a little perspective on how enormous this thing is, here is a picture of our front porch.
I also had one made with my Fussy Monkey Business logo. 
I used a stencil on this one.
I dirtied it up a bit too, but it's hard to tell in this picture.
 I didn't get a picture of Kera's finished monogram, but here she is hard at work on hers...she's probably going to kill me because she didn't know I was snapping pictures of her as well:o)
So swing on over to Sisterbug Monograms, and place your order for a fantastic wooden monogram. They range in size from 8 inches all the way up to 36 inches. It's never too early to start Christmas shopping!!

A big thank you to Kera for giving me a chance to get creative, and thanks to Brassy Apple for the inspiration and  fantastic tutorial!!


Monday, October 1, 2012

Fall Art-Finger Paint Tutorial

A few days ago, I helped out in E's kindergarten class. Once a month they have "Funtastic Friday." It's hands on learning, and it is lots of fun.
I helped them make really adorable shirts that they will wear on the field trip to the pumpkin farm at the end of the month. 
I loved the shirt so much, I decided that I wanted the kids to do it on canvas and use it as part of my Fall decor.
These little paintings were easy to make, and the kids loved getting their hands dirty.
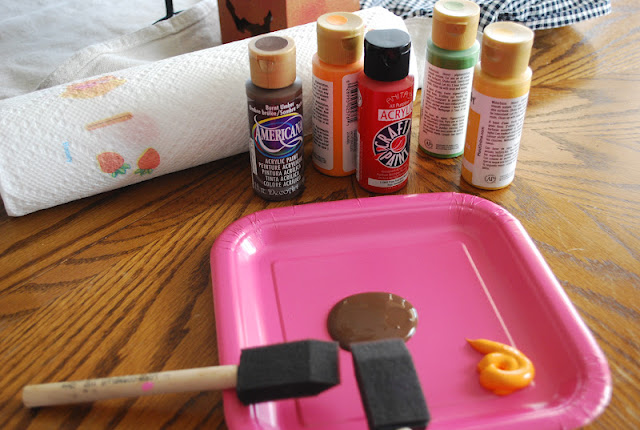
 Here's your supply list:
Paints- Brown, Green, Orange, Red and Yellow
2 Sponge Brushes
Paper Towels or baby wipes
Canvas
Paper plates to squirt paints in
Willing participants;o)
 Just a dab of each of the paints will do...this was actually too much paint for the both of them.
 You'll first want to paint the entire hand, and just below the wrist with brown paint. The kids get a kick out of this because they say it tickles:o)
 Once all of the hand has been painted, flip it over with fingers spread apart and press firmly on the canvas.
 You can see how much of her hand I painted in this picture.
 Next, let them dip their little finger tips into the paint, and start making leaves..(here's my little photographer..didn't he take great action shots?:o)) 
 The red dots are supposed to be apples...When they get all of their leaves painted, then it's time for the pumpkins at the bottom of the canvas.
 You will use your second sponge brush and paint this part of their fists orange.
 Make sure they keep their little thumbs out of the way
 Turn the canvas upside down and press their fist firmly against the canvas, just to one side of the tree trunk. Repeat on the other side. 
This is what they should look like when you're done.
I then added the finishing touches. I outlined the pumpkins with brown, gave them green curly-q's, and added stems to the pumpkins and the apples. 


Easy and fun Fall art for everyone to enjoy.