Hello dear friends! I have a little project to share with y'all today.
If you have been following along on Facebook, you know that I have been doing a little series called Thrifty Thursday's. It's where I share things that I have purchased from thrift stores or yard sales, and show you that it's possible to have awesome stuff without going broke.
This thrifty find deserved an actual blog post.
S.R. has been after me for a few months now to make her a Lego table. I'm sure you recall the Lego Table I made for her brother 2 years ago...has it really been that long?!?
When I made it for E, little sister wasn't really into Legos, so I didn't feel the need to make her one at the time.
Well that time is here, so I had to come up with something for her as well.
And here it is.
I found this table at one of the thrift stores I frequent. I happened to show up on one of their sale days. The table was $5. The store had coupons you could draw from a basket. I drew a 50% off coupon, so I used it on this table. $2.50 on a mostly wood table. Not too bad, eh?
I knew it would be just right for S.R.'s new Lego Table.
I needed to knock the finish off, so I used an orbital sander with 80 grit sand paper. It removed all the gunk off as well. It took about 10 minutes to finish that task.
The table had a 1/4" recess in the center, I need to fill it with strips of wood, so that the Lego plate wouldn't bow when being pressed down on.
Enter compound miter saw.
I forgot how.much.fun.this.thing.is!!!!
I want to start sawing everything in half now...just kidding...maybe not ;-)
 Once I measured and cut the wood, I stapled it down using the hubs' nail gun...also an awesome tool.
Now this was the tricky part. Here in Alabama, we are known for nasty, sticky humidity. One of the worst places to spray paint.
But I have a trick. I spray quickly, and immediately bring back into the house between coats. The dry time is a little longer because of the WET air, but it still works pretty well.
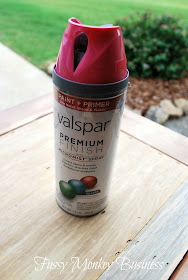
I really like Valspar for spray painting. I used to be a Krylon girl, but you only have a 1 hour painting window. Valspar is a little more forgiving, and if I have to go longer than an hour, the finish isn't compromised. I love it!
Sister chose pink, of course!
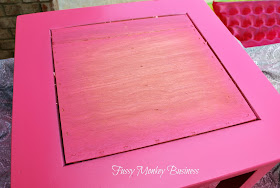
I sprayed the legs, apron, and the top edges of the table. I didn't paint the center because the Lego plate would be covering that space.
Here's a close up of the top. You can see I got a little staple happy...I Love Power Tools!!
I forgot to take a picture of the next 2 steps.
While the last coat of paint was drying, I drilled two holes on the table top and added some glitzy hardware to hold the Lego bag. I had originally intended for the hardware to go on my hair sink cabinet, but I saw how much S.R. loved them, so I decided to surprise her with them. She loves all things that glitter and sparkle...I don't know very many girls who don't!
After the knobs were in, I glued the Lego plate down with Liquid Nails. I set some heavy books on top to help it adhere.
I also sewed a bag with fabric I had in my stash to house her Legos. She only has a few Legos right now, so the bag should be enough for now. If her collection grows, there's plenty of room to set a basket under the table.
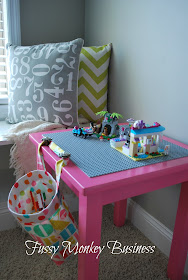
And here's the finished product.
A close up of the glitzy hardware.
And once again, the before and after.
I am so glad to have a project completed!
We start school in 2 1/2 weeks, so I am squeezing as much as I can into what little summer we have left!!
Make sure to check in with me on Facebook. I do most of my posting there.
Thanks for stopping by today!


