Cut List
Head- 5 1/2"x 5 1/2"(2)
Neck- 3"x 2"(2)
Body- 8"x 8"(2)
Legs- 11"x 2 1/2" (4)
Arms- 9"x 2 1/2"(4)
Mouth-I used some scrap chevron I had lying around.
Eyes-2" 2 Circles from white fabric and 2 from felt with adhesive(found at Hobby Lobby)
1/4" seam allowance throughout the entire project.
You will also need Lite Heat Bond, and Black Fabric Paint
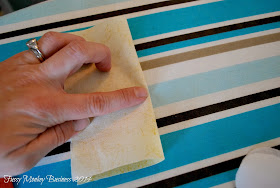
Finger press the head to find the center.
Place the eyes near the crease.
Apply the eyes and mouth using the heat bond and your iron.
Once it has cooled, take it to your machine and stitch to secure.
Next stitch the neck to the bottom of the head.
And then the neck to the body.
You will repeat the previous steps for the head neck and body for the backside of the monster as well.
Press necks seams inward.
Now, you will need to mark off the areas where the arms and legs will go. Measure 1" down from the shoulder and mark. Then 1 3/4" down from the first mark, as shown below with red dots.
You will do the same for the legs, 1" in and 1 3/4" apart.
Stitch front and back of monster with right sides together, making sure to back stitch at each dot, and leave the openings for the arms and legs open.
The bottom will be left completely open so you can stuff it at the end.

Turn right side out and press.
Stitch arms and legs together leaving one end open.
Stuff the arms and legs.
You will then attach the arms and legs to the body. Make sure to pay attention to which are the arms and which are the legs:o)
Once you have attached them, you will stuff the head and body of the monster.
When you have it where you want it, then stitch the bottom up.
The last thing you will do is to color in the eyes with the black fabric paint. I used a 1/2" circle and decided I wanted the eyes to be a little wonky.
E was so happy to get a monster, and he now sleeps in his bed and helps to keep the "real" monsters away!
Will you be making a monster to keep the "real monsters" away?


No comments:
Post a Comment